TL;DR
Moving your rig into another room is the most effective way to cut noise. For closet setups, ventilation and sealing gaps matter most. Proper placement of treatment and gear makes a huge difference, often more than expensive foam or barriers.
Think your closet is too small or too noisy to serve as a makeshift studio or workstation? Think again. The biggest noise-reducer isn’t fancy foam or soundproofing paint—it’s distance. Moving your rig into another room can make your workspace whisper-quiet, even with minimal treatment. This article reveals why placement beats products every time and how to make your closet a practical, effective space for sound.
We’ll cover simple tricks, like sealing gaps and choosing the right materials, alongside the more advanced—ventilation, bass trapping, and where to put acoustic panels for the best results. Whether you’re recording vocals, podcasting, or just trying to keep your noise down, these strategies will help you get your space just right.
Acoustic dampening
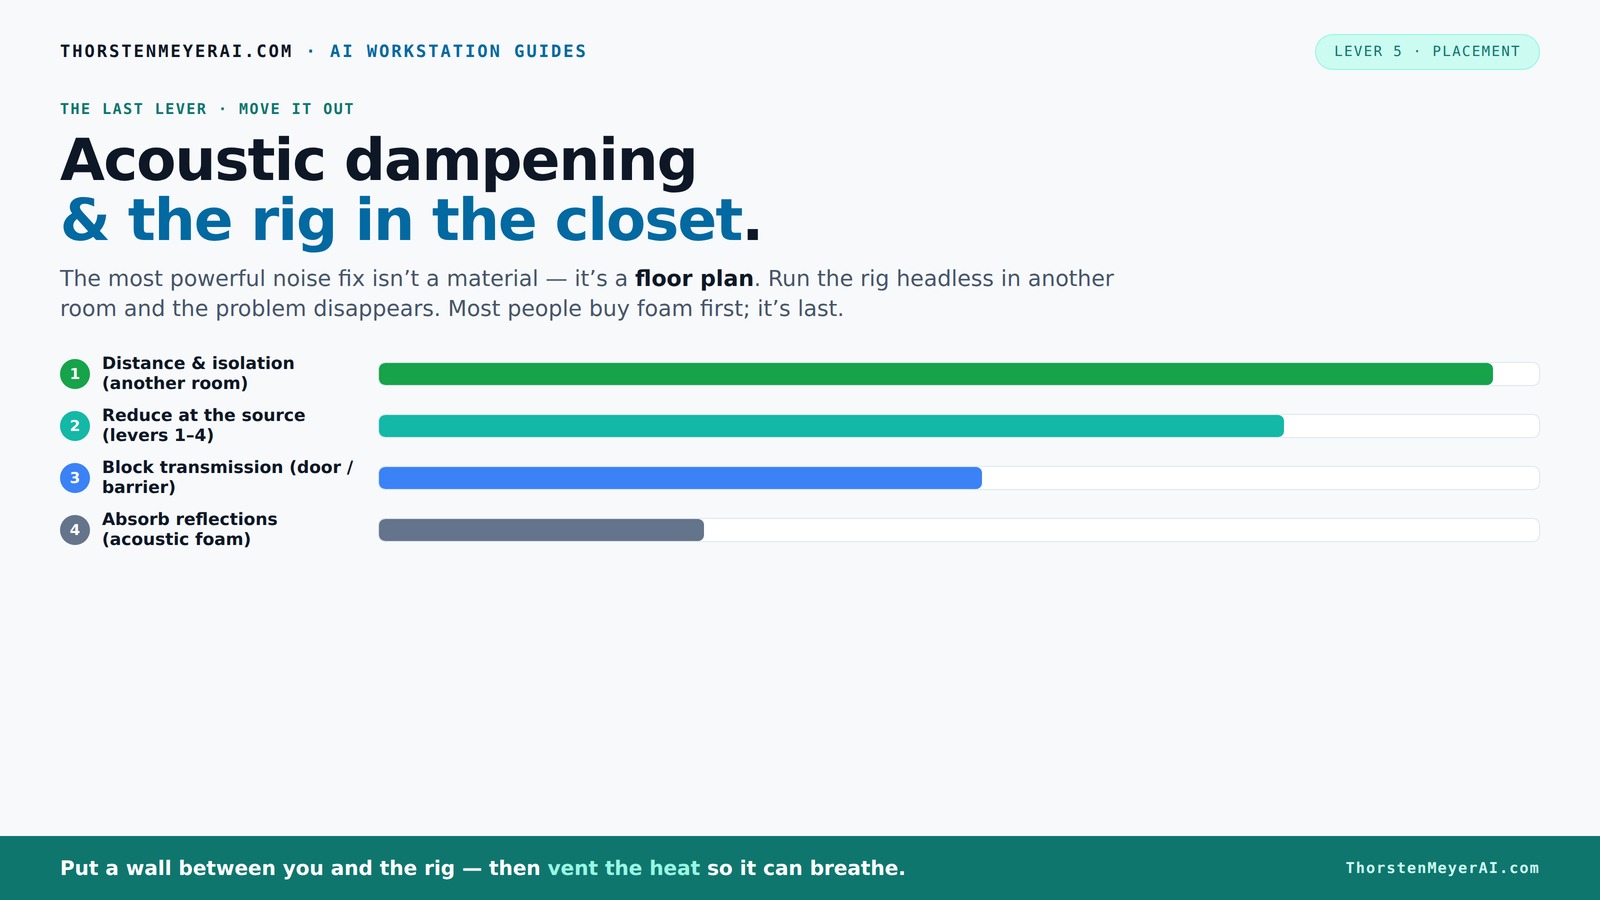
& the rig in the closet.
The most powerful noise fix isn’t a material — it’s a floor plan. A rig you can’t hear because it’s in another room beats any amount of foam. Tap the approaches in Part 1 to see what actually works.
(another room)
(levers 1–4)
(door / barrier)
(acoustic foam)
Contain the noise, not the heat
Key Takeaways
- Distance from the noise source is the most effective way to reduce sound—put your rig in another room if possible.
- Ventilation is critical in closet setups—sealed spaces trap heat, which causes noise and overheating.
- Strategic placement of acoustic panels and bass traps improves sound quality much more than random foam coverage.
- Sealing gaps around doors and vents prevents sound leaks and boosts overall isolation.
- Start with simple DIY fixes—sealing, absorption, and ventilation—before investing in expensive solutions.

Focusound 52 Pack Acoustic Foam Panels 1" x 12" x 12" Sound Proof Foam Panles Soundproofing Noise Cancelling Wedge Panels for Home Office Recoding Studio with 300PCS Double-Side Adhesive
Soundproofing - Acoustic foam panels triangular grooves structure for better noise absorption, helps to reduce and absorb unwanted...
As an affiliate, we earn on qualifying purchases.
As an affiliate, we earn on qualifying purchases.
Why Distance Is Your Best Noise Solution (And How Far Is Enough?)
The most powerful move you can make is to put physical space between you and your noisy rig. Why does this matter so much? Because sound diminishes with distance — roughly 6 dB each time you double the space between source and listener for airborne noise. This isn’t just about volume; it affects how much noise infiltrates your workspace, impacting your focus and comfort. For instance, a GPU humming away in a closet across the hall can be effectively inaudible if separated by a few walls, but sitting directly next to it makes noise unavoidable. This isn't just a convenience—it's a fundamental principle of acoustics that can save you money and effort by reducing the need for elaborate soundproofing. The tradeoff, of course, is the inconvenience of rerouting cables or adjusting your workflow, but the payoff in noise reduction can be dramatic and immediate. In practice, setting up a wired network connection is crucial to maintain performance when moving equipment out of the workspace, and proper ventilation is essential to prevent overheating. The key takeaway? Distance is free, effective, and often the most practical solution for noise control in small or shared spaces.

VEVOR Portable Vocal Booth, 6.56 ft Height, Portable Recording Studio with Travel Bag, Mobile Tablet Stand, Thickened Soundproofing, Sound Isolation Booth for Echo-Free Vocals, Podcasts, Voiceovers
Say Goodbye to Echoes: Built with durable Oxford cloth and acoustic padding, this recording booth for the home...
As an affiliate, we earn on qualifying purchases.
As an affiliate, we earn on qualifying purchases.
Turning a Closet Into a 'Rig in the Closet' — The One Big Rule
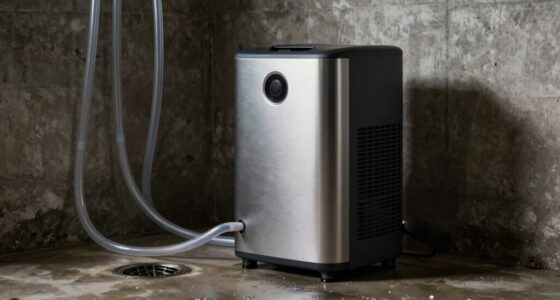
Placing your powerful, heat-generating machine inside a closet sounds like a perfect solution—it's out of sight and potentially quiet. But a sealed, unventilated space traps heat, which can lead to overheating, throttling, and increased fan noise. Overheating not only risks damaging your hardware but also causes fans to spin faster, creating more noise—defeating the purpose of a quiet setup. The solution isn’t just about adding a vent; it’s about understanding the balance between airflow and acoustic isolation. Proper ventilation ensures your rig stays cool and operates quietly, but it must be designed carefully to avoid creating new noise pathways. Passive vents can suffice, but a quiet exhaust fan with ducting can significantly improve airflow without introducing additional sound. For example, a small cabinet with a vent and a low-noise fan can keep a 600W GPU cool and reduce fan noise. Heavy-duty, purpose-built soundproof cabinets incorporate acoustic foam, ducting, and temperature controls, but even simple DIY solutions can make a big difference. The key is to allow airflow while preventing noise leaks—think of your closet as a breathing, cooling system rather than a sealed box. Check out this [guide on cooling and noise](https://thorstenmeyerai.com/reduce-heat-noise-ai-workstation/) for detailed insights.

118” Wedge-Shape Foam Window Weather Stripping Door Seal Strip,Soundproofing Frame Winter Insulation Tape for Exterior Front Door,Noise Cancelling Window Inserts,Door Gap Filler Light Blocker,White
Upgraded Wedge Design: This window draft stopper features an upgraded wedge design, tapering from 5/32" to 11/32" (0.16"–0.35")...
As an affiliate, we earn on qualifying purchases.
As an affiliate, we earn on qualifying purchases.
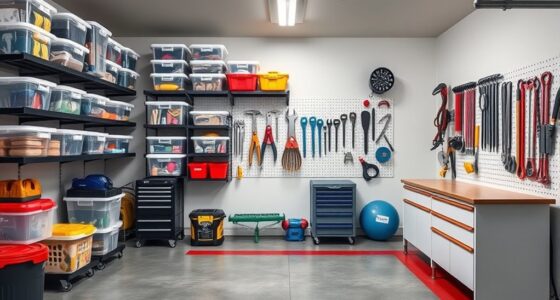
The Art of Placement: Acoustic Treatment and Gear Positioning
Where you position your microphone and how you treat your closet walls deeply influence your sound quality. Acoustic dampening isn't just about sticking foam randomly; it’s about understanding sound behavior in small, reflective spaces. Small spaces like closets tend to reflect sound waves, creating echoes and bass buildup that muddy recordings. Strategically placing acoustic panels at reflection points—behind your mic, on the ceiling, and in corners—can drastically reduce these issues. Bass traps in the corners absorb low-frequency resonances that tend to amplify in tight spaces, preventing that boomy, muffled sound. Soft surfaces like blankets, clothing, or acoustic foam absorb high frequencies, reducing harshness and echo. The goal is to tame reflections and control low-end buildup, which are the main culprits behind unnatural or muddled recordings. For example, placing a thick panel directly behind your mic can absorb reflected sound waves, resulting in clearer vocals. Corner bass traps prevent low-frequency buildup that causes muddiness. Moreover, mic orientation matters: facing away from reflective surfaces or using directional mics can significantly improve clarity. Think of your closet as a tiny concert hall—your placement decisions are the conductor’s baton, guiding the acoustics toward clarity rather than chaos.

8 Pack - Bass Traps Acoustic Foam Corner, 8''x8''x12'' Black Bass Traps Corner Studio Foam, High Density and Fire-Proof Acoustic Panels Recording Studio Acoustical Treatments
Acoustic Principle- Bass Trap is a kind of sound absorbing structure specially used to absorb specific low-frequency standing...
As an affiliate, we earn on qualifying purchases.
As an affiliate, we earn on qualifying purchases.
Sealing the Gaps: How to Block Sound Leaks Through Doors and Cracks
Sound leaks through tiny gaps—around doors, vents, and cracks—much like water seeping through tiny holes. These leaks can undermine your entire effort to contain noise, especially in small, enclosed spaces. Sealing these gaps is one of the most cost-effective, straightforward ways to significantly improve your sound isolation. Weatherstripping around the door frame, door sweeps, and draft stoppers can reduce sound leaks by 20-30 dB, which is a substantial improvement. Cover cracks around vents with acoustic sealant or foam to prevent sound from escaping or entering. A door with gaps acts like a speaker, dispersing noise into adjacent rooms, so sealing it effectively turns your closet into a more contained environment. For instance, adding weatherstripping around the door frame and installing a solid-core door wrapped in acoustic blankets can cut noise transmission dramatically. Covering cracks around vents with foam or acoustic sealant ensures that sound doesn’t leak through ventilation pathways. These small modifications are inexpensive but yield a big difference, making your space much more isolated and less disruptive to others. Remember, the goal isn’t just to dampen reflections inside but to block sound from escaping or entering—think of it as creating a sealed bubble of soundproofing around your workspace.
Should You Really Bass Trap a Closet? Yes, But Here’s When
Bass buildup is a common issue in small, enclosed spaces like closets—especially because parallel walls reflect low frequencies that can cause booming or muffled sounds. If your recordings sound muddy or your monitors produce a low-end resonance that seems exaggerated, bass trapping can help restore clarity. Dense foam or fiberglass panels placed in the upper corners of the closet absorb these low-frequency resonances, preventing them from bouncing around and coloring your sound. For example, a small closet with parallel walls can boost bass frequencies by 10-15 dB, leading to unnatural, boomy recordings. Installing bass traps in the corners reduces this build-up, resulting in a more balanced, natural sound. It’s important to measure your space or listen critically to determine if bass trapping is necessary—over-trapping can deaden the sound unnecessarily. Using a simple app or microphone to analyze frequency response can guide your decision. Heavy bass trapping isn’t always required, but in spaces prone to low-frequency issues, a few 4-inch thick traps in key locations can make a significant difference. Think of bass traps as the unsung heroes: without them, your recordings may sound hollow or muffled at low end, but with proper placement, your sound becomes more accurate and professional.
DIY vs. Professional: What Matters Most for Your Closet Studio
DIY solutions like blankets, foam panels, and sealing gaps are often sufficient for casual or semi-professional setups. They’re inexpensive, easy to implement, and effective at reducing reflections and minor noise leaks. However, if you’re aiming for high-quality recordings or need near-complete isolation, investing in purpose-built soundproofing and ventilation solutions can be worthwhile. For example, sealing a door with weatherstripping costs less than $20 and can halve sound leakage, while adding thick curtains or acoustic blankets can help tame reflections. But for serious recording, professional soundproof booths, custom cabinets with ducted airflow, or advanced acoustic treatments may be necessary. The key is to assess your needs realistically: start with simple, affordable fixes—sealing, absorption, and ventilation—and evaluate their effectiveness. If noise persists or quality isn’t satisfactory, then consider more advanced, possibly costly, solutions. The tradeoff is between budget, effort, and desired outcome. Remember, even small improvements can make a big difference, and often, a combination of DIY and professional tactics yields the best results.
Putting It All Together: Your Actionable Roadmap
- Move your rig to another room if possible. Distance is king.
- Seal all gaps around the closet door and vents.
- Strategically place acoustic panels at reflection points—behind the mic and on the ceiling.
- Use bass traps in the corners if low-end is boomy.
- Ensure proper ventilation—install a quiet exhaust fan or passive vents.
Once these steps are in place, your closet becomes a cleaner, quieter spot for recording or working. It’s easy, inexpensive, and surprisingly effective—no need for full construction or expensive foam everywhere. The key is understanding that each element—distance, sealing, treatment, and ventilation—works together to improve your space. Prioritize these steps based on your needs and budget, and you'll create a much more controlled environment for your audio projects.
Frequently Asked Questions
Can I truly soundproof a closet?
Complete soundproofing is tough with a closet—most solutions focus on reducing reflections and leaks rather than total isolation. Sealing gaps, adding mass, and using barriers help, but a closet can never be perfect without professional construction.Where should I place acoustic panels in my closet studio?
Place panels at reflection points—behind the mic, on the ceiling, and in corners where bass tends to build up. This targeted approach makes your recordings clearer and reduces harsh echoes.How much treatment do I need for a small closet?
Start with sealing gaps and adding 2-inch thick panels on the walls facing the mic and the ceiling. Add bass traps in the corners if you notice low-end buildup. Heavy coverage isn’t always necessary—measure and listen to guide your upgrades.Is acoustic foam enough for a closet setup?
Foam helps tame reflections, but it doesn’t block sound leaks or low-frequency issues. Combine foam with sealing gaps and possibly bass traps for a balanced, effective setup.What’s the best way to ventilate a closet with a rig inside?
Use passive vents or a quiet, ducted exhaust fan to push hot air out. Avoid sealing the space completely—ventilation prevents overheating and reduces noise caused by fans ramping up.Conclusion
Your closet can become a surprisingly effective studio or quiet work zone—if you focus on placement, sealing, and ventilation first. The best noise reduction isn’t just about absorbing sound; it’s about smartly creating distance and controlling heat.
Remember, a rig in another room often makes all the difference. It’s the simplest, cheapest, and most effective move you can make. So, why not turn your cluttered closet into a quiet sanctuary for your creative work?