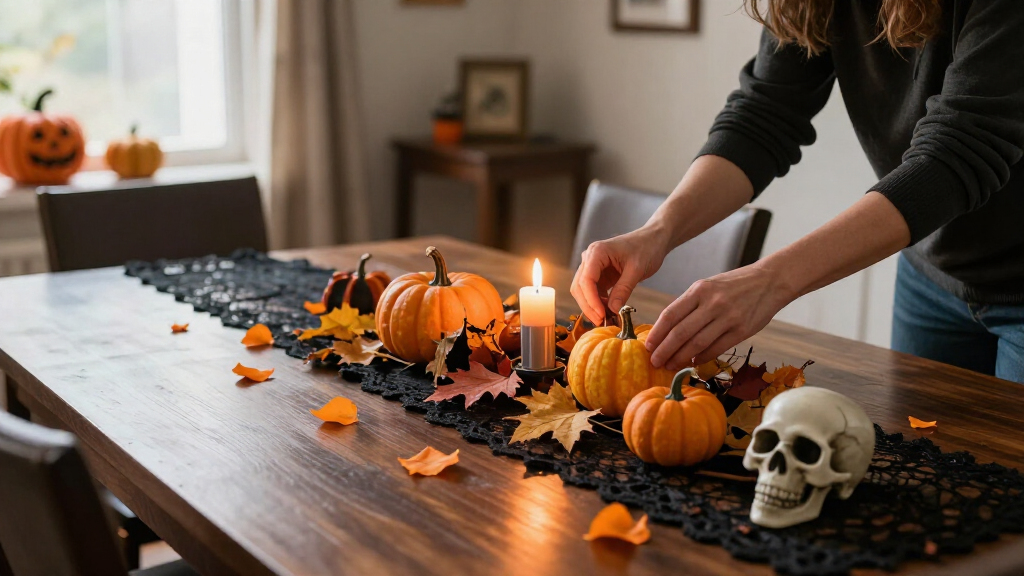
Create spooky Halloween decor by choosing a theme, arranging a few high-impact decorations, and adding lighting and sound without blocking walkways or creating hazards. This guide is for beginners decorating an indoor room, an entryway, or a small outdoor area; you can adapt the steps to your space and budget. Allow about 1-3 hours, depending on how much you already own and whether you need to test lights or prepare handmade props.

Get decor and gifts delivered free with Prime
- Fast, free delivery on millions of items
- Prime Video, Amazon Music and more included
- Member-only deals all year

ZPISF Halloween Spider Web Decorations with 150 Fake Spiders
- ✔ Coverage: Up to 1,400 sq. ft.
- ✔ Web weight: 14.5 oz (420 g)
- ✔ Included accessories: 150 fake spiders

BANANABROTHER Halloween Bloody Handprint and Footprint Stickers, 8 Sheets
- ✔ Brand: BANANABROTHER
- ✔ Material: Vinyl
- ✔ Pieces: 86

Cyantor Black Halloween Creepy Cloth, 5 Pieces
- ✔ Color: Black
- ✔ Material: Stretchy cotton
- ✔ Package quantity: 5 pieces
The finished display should read as one intentional scene from the main approach, feel appropriately eerie, and remain safe to walk through. You do not need costly props: fabric, paper silhouettes, battery-powered lights, and a few well-placed focal pieces can set the mood.
Difficulty: Beginner | Time: 1-3 hours
What You’ll Need
Tools & Materials:
- Tape measure or a few minutes to check the display area
- Scissors
- Painter’s tape or removable hooks suitable for the surface
- Extension cord rated for the intended indoor or outdoor use, if needed
- Flashlight for checking dark areas
Knowledge:
- Basic decorating and hanging skills
- Ability to check product labels for indoor or outdoor use
- No specialist crafting experience required
Set aside 1-3 hours, including setup and a final safety check. Gather decorations you already own before shopping. Check local rules and household preferences, and avoid materials or effects that could frighten young children, pets, or neighbors unexpectedly. For outdoor displays, check the forecast and use only weather-rated lights, cords, and props.
ZPISF Halloween Spider Web Decorations with 150 Fake Spiders
When we want a room, porch, or party space to read as haunted from across the way, ZPISF’s stretchable white cobwebs have the broadest reach in this lineup. The stated coverage of up to 1,400 square feet makes this the most ambitious option, and the 150 included fake spiders add distinct points of interest instead of leaving the webbing as an undifferentiated white layer. Compared with BANANABROTHER’s stickers, which concentrate their effect on glass and other smooth surfaces, these webs can shape a larger scene around furniture, fixtures, or outdoor displays.The scale comes with a setup tradeoff. The web material is described as soft and needs careful handling, so it may take patience to stretch it into convincing strands rather than clumps. It is also less precise than stickers: shoppers planning a neat, graphic window design may prefer BANANABROTHER’s separate handprints and drips. ZPISF is the strongest all-purpose pick for atmosphere, but storage and reuse details are not provided, so we should not assume it is designed for repeated seasons. Its advantage is transformation of space, not tidy, highly controlled placement.
Pros:
- Stated coverage reaches up to 1,400 square feet.
- Includes 150 fake spiders for additional detail.
- Stretchable webbing can be shaped for different displays.
- Suitable for indoor and outdoor decorating.
Cons:
- Soft material may need careful stretching and handling.
- No storage or reuse details are provided.
- Less precise for graphic surface designs than the vinyl stickers.
Best for: We recommend it for decorators who want to cover a broad indoor or outdoor area with a classic cobweb look and add many visible spider accents.
Not ideal for: Skip it if we need a clean, precisely arranged glass display, dislike handling delicate stretchable material, or require confirmed storage and reuse guidance.
Bottom line: For the widest cobweb effect and the most complete large-area scene, we put ZPISF first, provided we are comfortable shaping its delicate webbing.
“For the widest cobweb effect and the most complete large-area scene, we put ZPISF first, provided we are comfortable shaping its delicate webbing.”
BANANABROTHER Halloween Bloody Handprint and Footprint Stickers, 8 Sheets
BANANABROTHER’s 86-piece sticker set is the most direct way in this group to make a window look like part of a horror scene. Handprints, footprints, splatters, drips, scratches, and signs give us more visual variety than a single repeating motif, while the waterproof vinyl is designed for windows, glass, mirrors, walls, and other surfaces. It is also described as reusable and as peeling off cleanly, which makes it a more controlled seasonal choice than stretching cobwebs or hanging cloth.Its limitation is the surface: the strongest fit is smooth glass or mirrors, not a room-wide transformation. That makes it a better complement to ZPISF than a replacement; webs build atmosphere across a broad area, while stickers add a sharp focal scare where people will see it. Compared with Cyantor’s dark fabric, BANANABROTHER provides more literal horror imagery but less flexibility for covering or framing a large space. The glossy finish may also be more noticeable as a sticker, so shoppers seeking a subtle, natural-looking effect should consider cloth or webbing instead. Its indoor-and-outdoor use claim broadens placement, but the design remains distinctly Halloween-specific.
Pros:
- Includes 86 pieces across eight sheets.
- Waterproof vinyl is described as reusable.
- Designed to peel off cleanly after use.
- Works indoors or outdoors on suitable surfaces.
Cons:
- Best suited to smooth surfaces such as glass and mirrors.
- The Halloween-specific imagery has limited seasonal use.
- Does not create the broad, dimensional coverage of webbing or cloth.
Best for: We recommend it for decorators who want detailed, readable horror graphics on windows, glass doors, mirrors, or other smooth surfaces.
Not ideal for: Skip it if we need decoration for textured walls, broad fabric draping, or a neutral piece that can stay up beyond Halloween.
Bottom line: We rank these stickers second for their detailed, removable glass effects, though they work best as focused accents rather than a whole-room solution.
“We rank these stickers second for their detailed, removable glass effects, though they work best as focused accents rather than a whole-room solution.”
Cyantor Black Halloween Creepy Cloth, 5 Pieces
Cyantor’s five pieces of black stretchy cotton suit decorators who would rather shape a scene than apply a ready-made graphic. We can hang the cloth from windows, curtains, or ceilings, then cut or tear it to fit a doorway or display. That makes it the most adaptable option for creating a dark backdrop in this lineup. Compared with the ZPISF webs, it offers a solid black visual mass rather than pale strands; next to BANANABROTHER’s stickers, it can change the feel of a whole area instead of marking a particular pane of glass.The flexibility is also the main uncertainty. The listing gives no coverage area or piece dimensions, so we cannot reliably plan how much of a room the set will cover. It is designed for Halloween use, and the supplied details do not confirm reuse or cleanup behavior. As a result, it ranks behind the more defined large-area web set and the clearly itemized sticker pack. Choose it when customization and a dark, ragged silhouette matter more than exact coverage or a built-in spooky motif; skip it if we need a complete effect without trimming, arranging, or combining it with other decor.
Pros:
- Stretchy cotton can be cut or torn to fit a display.
- Five pieces offer flexibility for arranging a scene.
- Can be hung from windows, curtains, or ceilings.
- Suitable for indoor and outdoor displays.
Cons:
- No coverage area or piece dimensions are specified.
- Designed for seasonal Halloween use.
- Reuse and storage details are not provided.
Best for: We recommend it for creative decorators who want cuttable, hangable black fabric for a haunted-house backdrop or layered display.
Not ideal for: Skip it if we need a specified coverage amount, a ready-to-place graphic effect, or clear information about storage and reuse.
Bottom line: Cyantor is our pick for customizable dark draping, but its unspecified coverage makes it less predictable than the webbing or sticker options.
“Cyantor is our pick for customizable dark draping, but its unspecified coverage makes it less predictable than the webbing or sticker options.”
As an Amazon Associate we earn from qualifying purchases.
Before You Start
Choose a spot where decorations will not block a door, stairs, a fire escape, a handrail, or access to electrical panels. Keep exits and the full width of walkways clear. Do not use open flames near fabric, paper, leaves, or other flammable materials; use battery-operated candles instead. Keep cords out of walking paths, and do not overload outlets or connect more lights than the manufacturer permits. If you use a fog machine, follow its instructions and keep the output away from smoke alarms, people with breathing sensitivities, and slippery walking surfaces.
Decide whether your display is indoors, outdoors, or both. A prop suitable for a dry living room may not withstand rain or wind. Read decoration and lighting labels before installation, and keep packaging or product instructions available for electrical limits and mounting guidance.
Step-by-Step Instructions
Step 1: Choose the display area
Stand at the spot where guests will first see the decorations, then choose one contained area to dress: a front porch, entryway, window, mantel, or corner of a room. Measure or visually mark the available width and height. Identify doors, stairs, vents, outlets, and the walking route before placing anything. Decide how people will enter and leave without brushing against props.
Tip: A small display with a clear focal point often looks spookier than decorations spread thinly across a whole home.
Check: You can point out the display boundary, the main viewing direction, and an unobstructed route through or past the area.
Step 2: Set a simple spooky theme
Pick one theme that suits the space, such as haunted house, graveyard, witch’s apothecary, or ghostly woodland. Choose two or three main colors, such as black, gray, and warm orange, and decide whether the mood should be eerie, playful, or family-friendly. Write down the focal prop you want visitors to notice first and two supporting details that fit the same theme.
Tip: Limit competing colors and motifs. Mixing unrelated themes can make a display look cluttered instead of intentional.
Check: Your theme can be described in one short phrase, and the decorations you plan to use fit that phrase.
Step 3: Sort and test your decorations
Lay out the decorations you plan to use and group them as focal pieces, background pieces, and small details. Check props for damage, loose fasteners, sharp edges, or unstable bases. Plug in each light or sound device one at a time and confirm that it works before hanging or positioning it. Check labels for indoor or outdoor suitability, required power source, and any connection limits.
Tip: Replace damaged cords or cracked electrical housings; do not patch them with ordinary tape or hide damage behind a prop.
Check: You have a working set of decorations that fits the area, and you know which pieces require power, batteries, or weather protection.
Step 4: Prepare the background
Clear the display area of everyday clutter and clean the surfaces where removable hooks or tape will go. Hang a dark cloth, paper backdrop, or simple window silhouette if it supports your theme. Attach each piece according to its product directions and test the hold gently before adding other decorations. Keep fabric and paper away from heaters, candles, hot bulbs, and vents.
Tip: Test removable adhesives on a small, hidden patch first, especially on painted walls, wallpaper, or delicate finishes.
Check: The background stays in place without covering vents, exits, or controls, and it gives the focal pieces a clear setting.
Step 5: Place the focal decoration
Position the largest or most noticeable prop where it can be seen from the approach you chose. Set it at a stable height and angle: hang it from a secure approved hook, place it on a steady surface, or anchor it as directed. Keep it out of the door swing and away from steps and handrails. Step back to check whether it is visible without blocking the route.
Tip: Do not hang heavy items from ceiling tiles, weak curtain rods, or adhesive hooks that are not rated for the item’s weight.
Check: The focal piece is secure, visible from the main approach, and does not obstruct movement or an exit.
Step 6: Add supporting props in layers
Arrange medium-sized props around the focal piece, then add a few small details near the front or edges of the display. Vary height by using stable shelves or boxes hidden under cloth, but do not create a climbing or tipping hazard. Leave some open space so each piece is easy to see. For an outdoor scene, secure lightweight items against wind using suitable stakes or ties.
Tip: Keep decorations away from door handles, mail slots, house numbers, and any surface guests need to use.
Check: The display has a clear focal point and supporting details, while all props remain stable and the route stays open.
Step 7: Set up lighting and sound safely
Place battery-powered lights or approved decorative lighting to highlight the focal area, window shapes, or pathway edges. Route cords along walls or behind furniture, secure them with suitable cord covers or clips, and keep them out of puddles and foot traffic. Use only outdoor-rated products outside, plug them into a suitable protected outlet, and follow the maker’s limits for connected strings. Set sound devices at a volume that does not mask doorbells, alarms, or conversation.
Tip: Avoid placing flashing lights where they could affect someone sensitive to flashing or create glare for drivers and passersby.
Check: Lights and sound operate as planned, cords are not exposed across walkways, and the display remains visible without creating harsh glare.
Step 8: Check the display from the guest’s route
Turn on the display and walk toward it as a guest would. Check it in the lighting conditions when visitors are likely to arrive. Use a flashlight to inspect dark steps, low props, loose cords, and trip points. Move any item that hides a step or makes the route feel narrow. Ask another household member to walk through if the display is near a shared entrance.
Tip: Do not darken a path so much that guests cannot see changes in floor level or the door threshold.
Check: A person can approach, view the scene, and leave without touching decorations or guessing where to step.
Step 9: Secure the setup and plan removal
Fasten or weigh down pieces that could tip or blow away, and make sure every light is switched off or controlled safely when unattended. Keep spare batteries, instructions, and any removed packaging together. Note which attachments are temporary and how to take them down without pulling paint or damaging surfaces. Recheck outdoor pieces after wind or rain.
Tip: Do not leave powered decorations running unattended unless their instructions allow it and the setup is suitable for continuous use.
Check: Props are stable, electrical items are used within their ratings, and you know how to switch off and remove the display.
Common Mistakes to Avoid
- Adding too many unrelated decorations until the display looks crowded. — Choose one theme, limit the palette, and remove pieces that compete with the focal prop or block visual space.
- Using indoor lights, fabric, or paper in an exposed outdoor location. — Check each product label and keep non-weather-rated decorations indoors or in a dry, protected area.
- Running cords across a doorway, stair, or walkway. — Use battery-powered lights where possible; otherwise route and secure cords along walls, away from feet and water.
- Using open flames near flammable decorations. — Choose battery-operated candles and keep all lights and props at the distances required by their instructions.
Troubleshooting
Problem: A removable hook or tape will not stay attached.
Solution: Remove the item, clean and dry the surface as directed by the adhesive maker, and try a compatible attachment rated for the item’s weight. Use a freestanding prop instead if the surface is delicate or unsuitable.
Problem: The outdoor display shifts or falls over in wind.
Solution: Bring lightweight pieces inside, or secure outdoor-rated props with appropriate stakes, ties, or weights. Do not attach decorations to unstable railings or block a public path.
Problem: A light string does not turn on.
Solution: Switch it off before checking the power source. Test the outlet with another suitable device, replace batteries if applicable, and inspect the string for damage. Stop using it if cords, plugs, or housings are frayed, cracked, or hot.
Problem: The display is hard to see at night or the entrance feels unsafe.
Solution: Add steady, low-glare lighting to steps and the route, then reposition props that hide edges or thresholds. Keep any colored or flashing effect away from the walking surface.
What Success Looks Like
Your Halloween display has one recognizable theme and a visible focal point supported by a few coordinated details. Decorations remain stable, lighting works, cords and props stay clear of the route, and guests can see doors, steps, and thresholds. Outdoor items are rated and secured for their location. You can switch the display off and remove it without leaving an unsafe or damaged area.
Next Steps
Check the setup before visitors arrive and after changes in weather. Switch off lights when they are not needed, replace batteries only according to product instructions, and remove damaged items from use. After Halloween, take down decorations carefully, remove temporary adhesive as directed, and store clean, dry props with their power supplies and instructions. Reuse sound or lighting pieces in future displays, and replace any item that cannot be stored or used safely.
Frequently Asked Questions
How can I make Halloween decor look spooky without buying many props?
Use a dark background, one strong silhouette or focal prop, and a small number of battery-powered lights. Rearranging existing fabric, branches, paper cutouts, or household containers can add texture, as long as materials are stable and kept away from heat and flames.
How do I decorate a small entryway without blocking it?
Decorate vertically with a window silhouette or a securely hung lightweight prop, and keep the floor and door swing clear. Place small items on a stable surface outside the walking route, and check that guests can use the handle and see the threshold.
Can I use ordinary indoor string lights outside?
No. Use lights, cords, and connectors marked for outdoor use in exposed areas. Follow the maker’s instructions for connections and power, protect plugs as directed, and remove the lights if they become damaged or wet beyond their rating.
What is the safest way to make candles look spooky?
Use battery-operated candles, especially near fabric, paper, dried leaves, or other props. Place them where they cannot fall into the walking route, and follow their instructions for battery and charging or storage.
How often should I check outdoor Halloween decorations?
Inspect them before visitors arrive and after rain or strong wind. Check that props remain stable, cords and plugs are dry and undamaged, and paths have not become blocked by fallen decorations or debris.
Fall Picks
fall essentials
As an affiliate, we earn on qualifying purchases.