
To install a ceiling track lift, start by measuring your space and planning the track layout, ensuring the ceiling can support the weight. Choose the right system, then prep the area by clearing obstructions and verifying ceiling strength. Mount brackets securely into joists or anchors, align the track carefully, and tighten all fasteners. Finally, set up the lift and perform safety checks. Keep in mind, proper installation is key to safety and performance—more details follow for a smooth setup.
Key Takeaways
- Measure the room and ceiling support to determine optimal track placement and ensure structural integrity.
- Select the appropriate track material and verify compatibility with ceiling type and lift weight requirements.
- Mount brackets securely into ceiling joists or anchors, ensuring proper alignment with a level.
- Follow manufacturer instructions carefully during installation, tightening all fasteners and distributing weight evenly.
- Regularly inspect, maintain, and lubricate the lift system to ensure safety, smooth operation, and longevity.
Assessing Your Space and Planning the Layout

Before installing ceiling track lifts, you need to carefully assess your space and plan the layout to guarantee safety and functionality. Start by measuring your room’s dimensions and considering the best placement for the lift system. Think about decorating options—will the lift be discreet or a feature? This influences where you install it. Also, review electrical requirements; ensure nearby outlets or wiring can support the lift’s power needs. Clear any obstructions and verify ceiling strength to support the track and weight capacity. Keep safety in mind, avoiding areas with high traffic or fragile fixtures. Proper planning ensures smooth installation, ideal use, and a seamless integration with your existing space. A thoughtful layout sets the foundation for a successful ceiling lift system. Additionally, assessing the ceiling’s structural integrity is crucial to ensure it can safely support the weight and stress of the lift over time.
Selecting the Right Ceiling Track Lift System

Choosing the right ceiling track lift system involves evaluating your specific needs and the features of available options. First, consider the track material—aluminum is lightweight and corrosion-resistant, making it suitable for most environments, while steel offers extra durability for heavier loads. Next, assess the weight capacity you require; verify the lift can safely handle the maximum weight of the individual or item you plan to lift. It’s crucial to match the system’s weight capacity with your needs to avoid overloading or underperforming. Additionally, think about the track length and flexibility, so it fits your space comfortably. Understanding load capacity requirements and selecting a system that meets those needs can help ensure safety and reliability. By understanding these factors, you can select a ceiling track lift system that provides safe, reliable support tailored to your specific requirements.
Preparing the Installation Area

To guarantee a safe and effective installation, you need to prepare the area thoroughly. Start by clearing the space of furniture and obstacles. Inspect the ceiling for existing electrical wiring to avoid damage and ensure proper clearance. Check for wall anchors or other fixtures that could interfere with mounting. If necessary, reinforce the ceiling with additional support. Use the following table to help organize your prep:
| Item to Check | Important Details |
|---|---|
| Wall anchors | Remove or reinforce as needed |
| Electrical wiring | Mark or disconnect safely |
| Ceiling support | Ensure it’s sturdy enough |
Proper preparation minimizes risks and ensures a smooth installation process. Taking these steps helps prevent damage and guarantees your ceiling track lift functions safely. Additionally, understanding the installation requirements of the lift system can further enhance safety and performance.
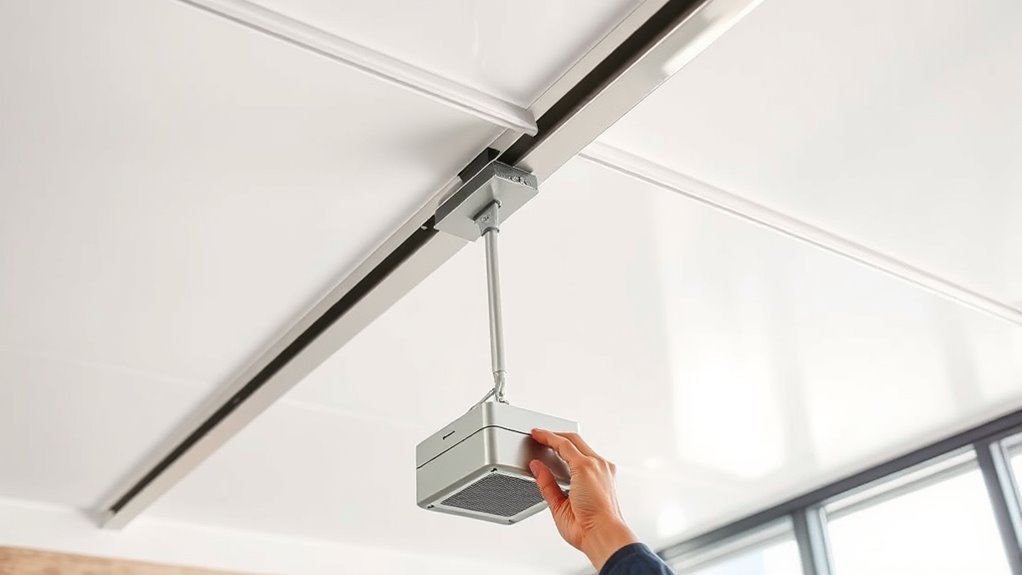
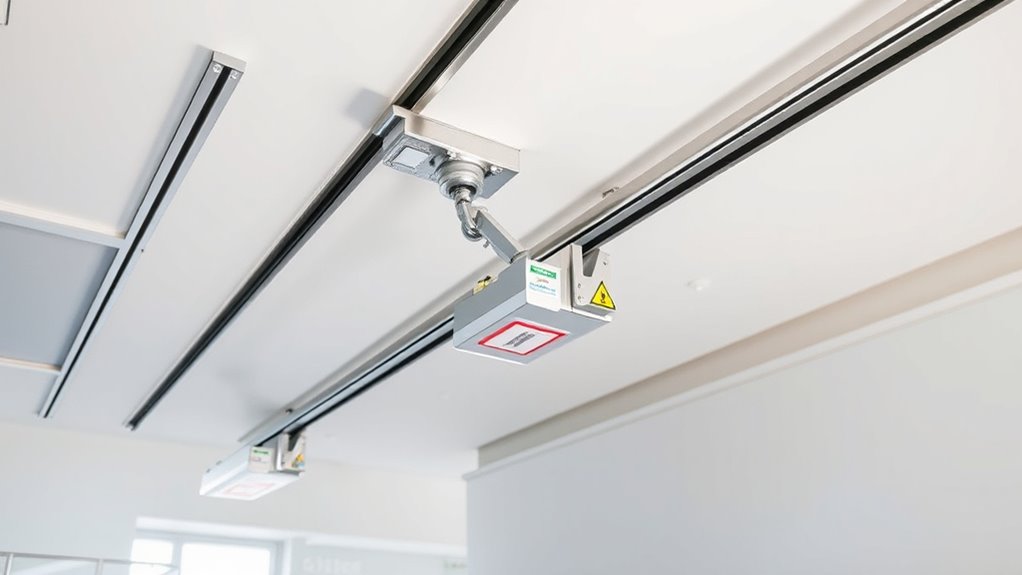
Installing the Mounting Hardware and Track
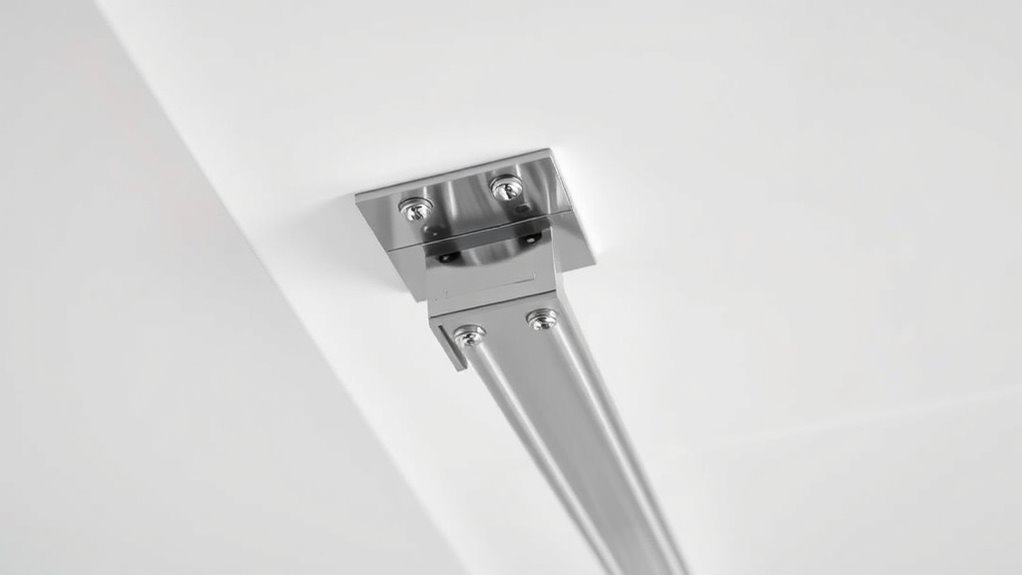
Once you’ve prepared the installation area, you can begin mounting the hardware and track. First, verify the hardware is compatible with your ceiling type and weight requirements. Check the manufacturer’s instructions for specific hardware compatibility details. When attaching the mounting brackets, consider aesthetic considerations—aim for a clean look that blends with your ceiling’s design. Use a level to align the track properly, ensuring smooth operation later. Secure the brackets firmly into ceiling joists or appropriate anchors. Once the hardware is secured, slide the track into position, making sure it’s flush and straight. Double-check all connections for stability. Additionally, inspecting the ceiling structure for proper support will help prevent issues over time. Taking these steps carefully will set a solid foundation for your ceiling lift, balancing both functionality and visual appeal.
Securing the Track and Ensuring Stability
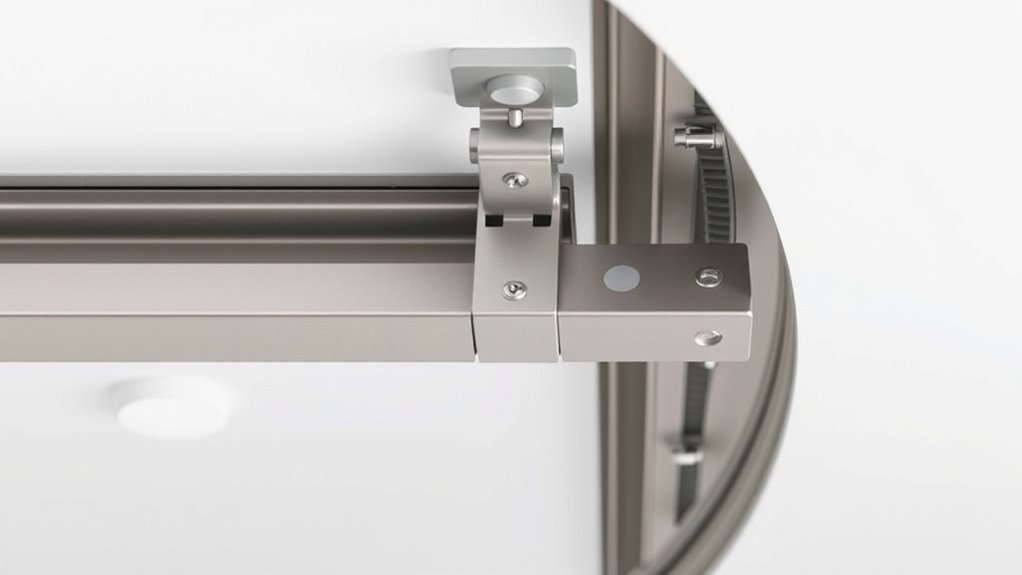
After positioning the track, it is vital to secure it firmly to prevent movement during operation. Proper track alignment ensures the lift moves smoothly without jamming or derailing. Double-check that the track lines up correctly with your markings and that all mounting brackets are tightly fastened. Pay attention to weight distribution; evenly distributing the load across the track helps maintain stability and prevents undue stress on specific points. Use appropriate anchors and screws rated for the ceiling material to guarantee a secure hold. Periodically check the track’s stability after installation, tightening any loose fittings. This step guarantees the track remains steady, reducing the risk of accidents and ensuring reliable operation of your ceiling lift. Additionally, understanding merchant services can help you select the best payment options for your installation business.
Setting Up the Lift Mechanism and Testing
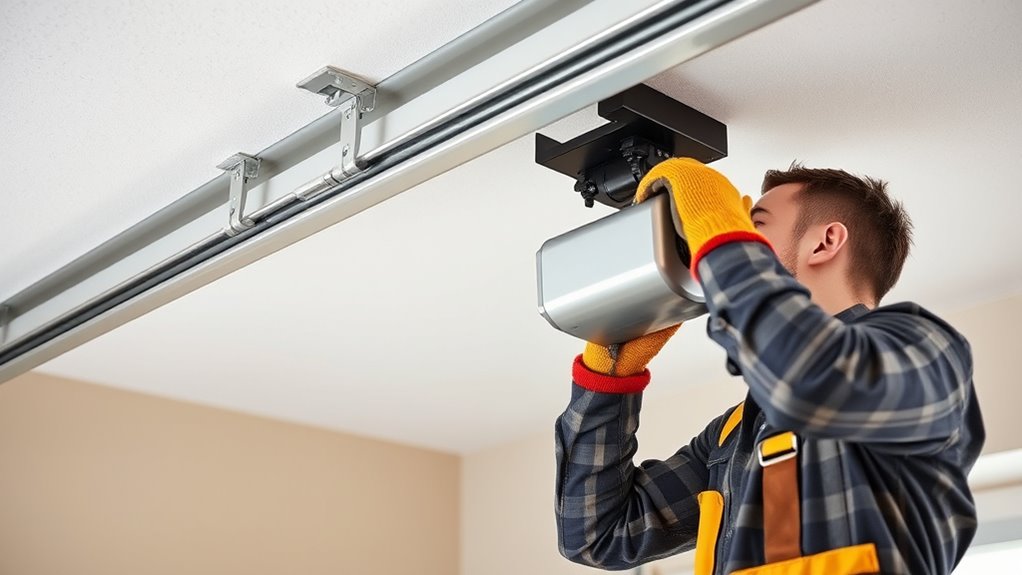
With the track securely in place, it’s time to set up the lift mechanism and make sure everything functions correctly. Begin by connecting the electrical wiring according to the manufacturer’s instructions, guaranteeing all connections are secure and insulated. Double-check power sources and switches to confirm proper operation. Once wired, test the lift’s movement by raising and lowering it slowly, paying attention to any irregular sounds or hesitations. This step helps identify wiring issues or mechanical problems early. Additionally, take time to train users on how to operate the lift safely, including loading procedures and emergency stops. Proper testing and user training ensure smooth operation and safety, reducing the risk of accidents and prolonging your lift’s lifespan. Incorporating regular maintenance checks can further enhance the longevity and safety of your ceiling track lift.
Final Safety Checks and Maintenance Tips
Before using your ceiling track lift regularly, make sure to examine all components for wear or damage. Keep the moving parts well-lubricated to ensure smooth operation and prevent unnecessary strain. Regular maintenance like this helps keep the lift safe and reliable for everyday use.
Inspect Lift Components Regularly
Regularly inspecting lift components is essential to guarantee your ceiling track lift operates safely and reliably. Check for signs of wear, loose connections, and corrosion. Ensuring component compatibility and following safety precautions helps prevent accidents and equipment failure. Use the table below to understand key inspection areas:
| Component | Inspection Focus | Potential Issue |
|---|---|---|
| Track and trolley | Alignment and stability | Bent or misaligned parts |
| Motor and gears | Operation and noise | Unusual sounds, overheating |
| Mounting brackets | Secure attachment | Loosened or damaged parts |
Regular inspections keep your lift functioning safely and extend its lifespan, safeguarding everyone involved. Additionally, paying attention to filter replacement and routine maintenance ensures optimal performance and safety.
Lubricate Moving Parts
Ensuring moving parts are properly lubricated is a crucial step in the final safety checks and maintenance of your ceiling track lift. Regular lubrication helps prevent wear and ensures smooth operation. You should establish a lubrication frequency based on usage—more frequent if the lift is used daily, less if used occasionally. Always use compatible lubricants recommended by the manufacturer to avoid damage or buildup that could impair movement. Apply lubricant to all moving components, including pulleys, gears, and tracks, making sure to wipe away excess to prevent dirt accumulation. Proper lubrication reduces friction, extends equipment life, and enhances safety during operation. Incorporating mindfulness techniques into your maintenance routine can help you stay attentive to signs of wear and ensure timely servicing, ultimately keeping your ceiling track lift functioning reliably and safely over time.
Frequently Asked Questions
Can Ceiling Track Lifts Support All Weight Capacities?
You might wonder if ceiling track lifts can support all weight capacities. It depends on the lift’s strength and design; many models are built for specific weight limits. Always check the manufacturer’s specifications to verify the lift’s weight capacity matches your needs. Using a lift beyond its recommended capacity can be unsafe. Choose a lift with appropriate strength to safely support the user’s weight and prevent accidents.
Are Ceiling Track Lifts Suitable for Outdoor Use?
You might think it’s a tall order, but ceiling track lifts aren’t typically designed for outdoor use. They lack the outdoor durability and weather resistance needed to withstand elements like rain, snow, or direct sunlight. If you want a lift system outside, look for models specifically made for outdoor environments. Otherwise, you risk damaging the equipment and compromising safety, which is a gamble you don’t want to take.
What Is the Typical Lifespan of a Ceiling Track Lift?
The typical lifespan of a ceiling track lift varies based on maintenance considerations and usage. With regular maintenance and inspections, a lift can last 7 to 15 years. You should also guarantee safety features are functioning properly to extend its life. Proper care, timely repairs, and adherence to manufacturer guidelines help maximize durability, making the lift a reliable, long-term solution for your mobility needs.
How Often Should the Lift Mechanism Be Serviced?
Think of your ceiling track lift as a trusted companion, needing regular check-ups to stay strong. You should service the lift mechanism at least every 6 to 12 months, depending on usage. Regular maintenance keeps it running smoothly, preventing unexpected breakdowns. Follow troubleshooting tips like inspecting for loose parts or unusual noises. Consistent care guarantees your lift remains reliable, providing safe, seamless assistance whenever you need it most.
Can I Install a Ceiling Track Lift Myself Without Professional Help?
You can attempt DIY installation of a ceiling track lift if you’re comfortable with basic tools and follow all safety precautions. However, it’s vital to carefully read the manufacturer’s instructions and make sure your ceiling can support the lift. Don’t skip safety steps or underestimate the complexity. If you’re unsure or uncomfortable, it’s best to hire a professional; safety should always come first when installing a ceiling track lift yourself.
Conclusion
With your space now transformed into a smooth-operating haven, think of your ceiling track lift as the heartbeat that keeps everything moving effortlessly. You’ve laid down the foundation, secured the track, and tested the mechanism—like tuning a fine instrument. As you step back, enjoy the symphony of safety and functionality you’ve composed. With this setup, lifting becomes a breeze, turning your ceiling into a stage where convenience and security dance in perfect harmony.