To install grab bars without damaging tiles, carefully choose a location near the shower or toilet, ensuring it’s against a solid wall like a stud. Use proper tools like carbide-tipped drill bits and mark your spots with painter’s tape for precision. Drill slowly at a steady pace and avoid excessive pressure. Consider adhesive mounts or reinforcement methods if you’re hesitant to drill. Keep your installation secure and stable—continue for detailed tips on achieving safe, damage-free support.
Key Takeaways
- Mark drill points accurately at wall studs, avoiding loose or uneven tiles, and use painter’s tape to prevent tile damage.
- Use specialized tile drill bits and apply sealant along holes to minimize cracking risks during installation.
- Opt for adhesive mounts rated for bathrooms to eliminate drilling and reduce tile damage.
- Reinforce mounting areas with backer boards or plywood for added support without damaging tiles.
- Verify the grab bar’s stability post-installation through gentle pressure tests and regular maintenance checks.
Choosing the Right Location for Your Grab Bars
Choosing the right location for your grab bars is crucial to guarantee safety and stability. You want to confirm they’re positioned where you need support most, like near the shower, bathtub, or toilet. Consider tile safety by avoiding areas with loose or uneven tiles, which could compromise installation. Think about bathroom design too—grab bars should blend seamlessly without disrupting aesthetics or accessibility. Measure carefully to place them at the correct height, typically around 33 to 36 inches from the floor, and ensure they’re securely anchored into wall studs whenever possible. Proper placement not only increases safety but also maintains the visual appeal of your bathroom. Taking time to plan the ideal spots helps you avoid damage and creates a safer, more functional space.
Using Proper Tools and Materials for a Damage-Free Install

To guarantee a damage-free installation of grab bars, using the right tools and materials is essential. Proper tile preparation ensures the surface is clean and smooth, preventing cracks or chips during drilling. Wall reinforcement strengthens weak spots, supporting the grab bar securely. Use a masonry bit for drilling into tiles and a level to ensure accurate placement. Additionally, consider wall anchors designed for tile and reinforced areas to distribute weight evenly. Here’s a quick overview: Glycolic acid benefits and the proper application techniques help maintain healthy, resilient skin that can better support fixtures like grab bars. | Tools & Materials | Purpose |
| ————————– | —————————————— |
|---|---|
| Tile drill bits | Precise, damage-free drilling |
| Wall anchors | Secure reinforcement |
| Level | Accurate positioning |
| Tile repair kit | Fixing minor damage, if needed |
This approach minimizes risk and guarantees a sturdy, damage-free installation.
Marking Precise Mounting Points to Avoid Tile Damage

Start by using a level tool to guarantee your markings are straight and level. Measure multiple points to find the best mounting spots, then mark them with a non-permanent marker. This approach helps you avoid mistakes that could crack or damage your tile during installation. Additionally, testing the appropriate drill bit size on a spare tile can prevent accidental cracks or chips.
Use a Level Tool
Using a level tool is essential for marking precise mounting points, which helps prevent accidental damage to your tiles. Proper tool selection ensures you can accurately align your grab bar without risking tile safety. When choosing a level, opt for one that’s easy to read and suitable for the size of your tiles. Keep these tips in mind:
- Verify the level’s accuracy before use to ensure precise markings.
- Use the bubble or digital display to confirm your lines are perfectly straight.
- Position the level along your marked points to double-check alignment before drilling.
- Additionally, understanding nutritional advantages of green juice can inform choices for healthy hydration options during your home improvement projects.
Measure Multiple Positions
Since tiles can crack or chip easily, it’s important to measure multiple positions before marking your mounting points. Carefully consider your tile preparation by selecting the right grab bar that fits your space and needs. Use a tape measure and a level to find several potential spots, ensuring they align with studs or solid backing if possible. Mark each position lightly with painter’s tape or a non-permanent marker to compare height and distance, avoiding unnecessary stress on the tile. Taking multiple measurements helps you identify the most suitable location that provides support without risking damage. Remember, precise measurements and thoughtful planning during tile preparation are key to installing grab bars securely and without causing cracks or chips. Additionally, understanding waterproofing techniques can help protect your tiles and ensure a durable installation.
Mark With Non-Permanent Marker
After measuring potential mounting spots, it’s important to mark them accurately without damaging the tile surface. Use a non-permanent marker to clearly indicate where you’ll drill or install wall anchors. This prevents mistakes and keeps your tile intact. To guarantee precision:
- Test a small area first with a temporary adhesive or painter’s tape to confirm placement.
- Mark the exact spots for wall anchors, avoiding areas with grout lines or cracks.
- Double-check measurements before making any holes to prevent unnecessary damage.
- Remember that proper marking techniques are essential for maintaining tile integrity and achieving a secure installation.
Using a non-permanent marker keeps your markings easily erasable, allowing adjustments. If needed, lightly tap the wall with a hammer to confirm wall studs or use a level for accuracy. This careful marking process helps you install grab bars securely without risking tile damage.
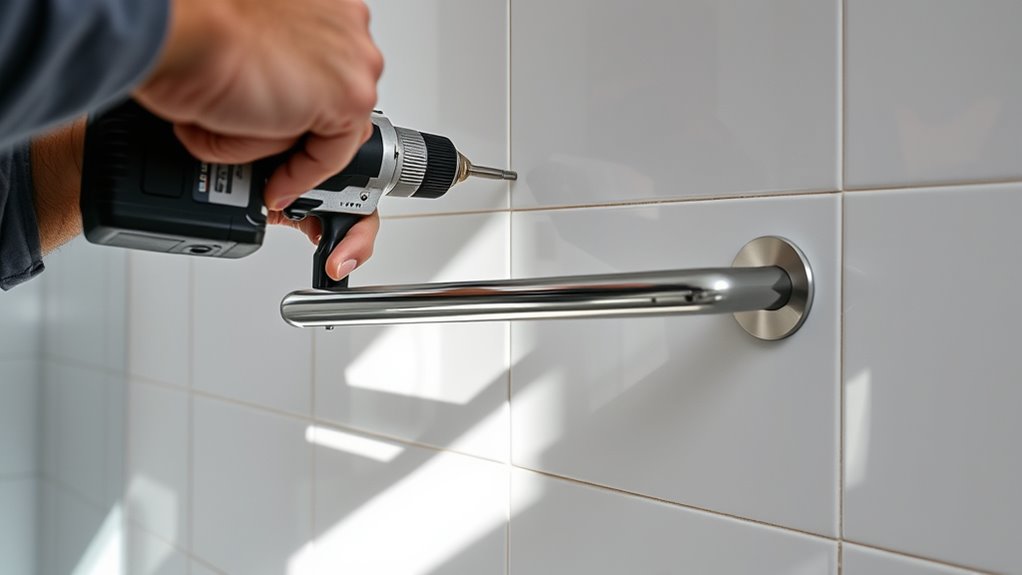
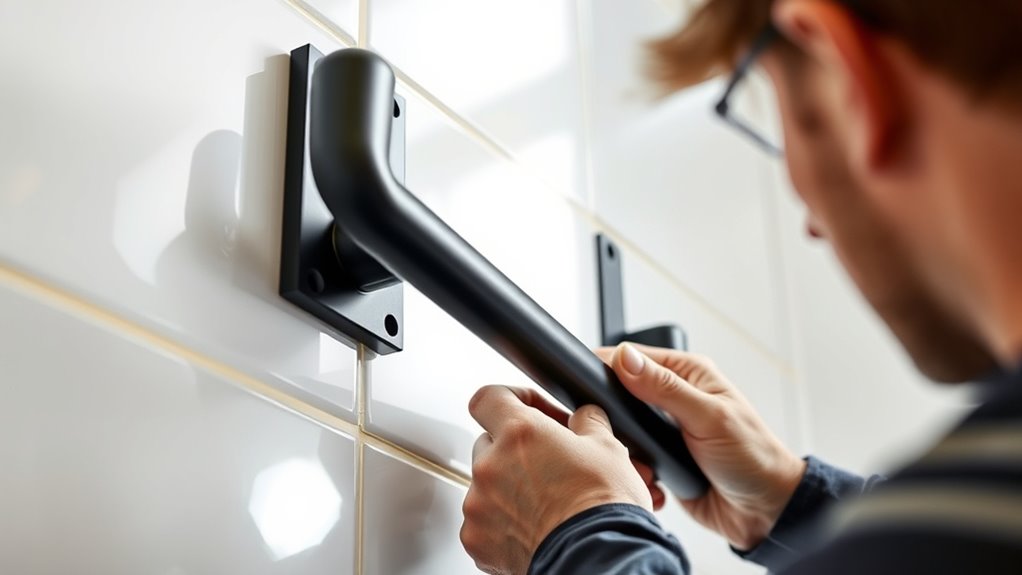
Drilling Techniques to Protect Tile Integrity
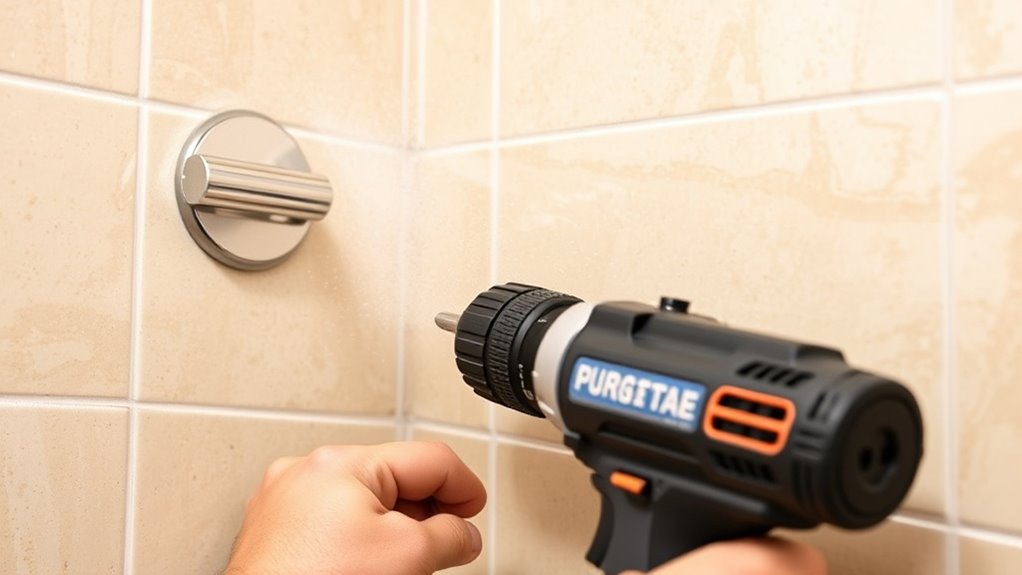
To prevent damaging your tile when drilling for grab bars, it’s vital to choose the right techniques and tools. Start by selecting the appropriate drill bit types—carbide-tipped or diamond-tipped bits work best for tile. Before drilling, apply a thin layer of tile sealant along the planned hole to reduce cracking risk and help seal the tile afterward. Use a slow, steady drill speed to avoid overheating and cracking the tile surface. Keep the drill perpendicular to the wall to guarantee a clean hole. Avoid excessive pressure, letting the drill do the work. If you encounter resistance, pause and adjust your technique. Proper drilling techniques help protect your tile’s integrity and ensure a secure, safe installation.
Utilizing Adhesive Mounts as a No-Drill Alternative
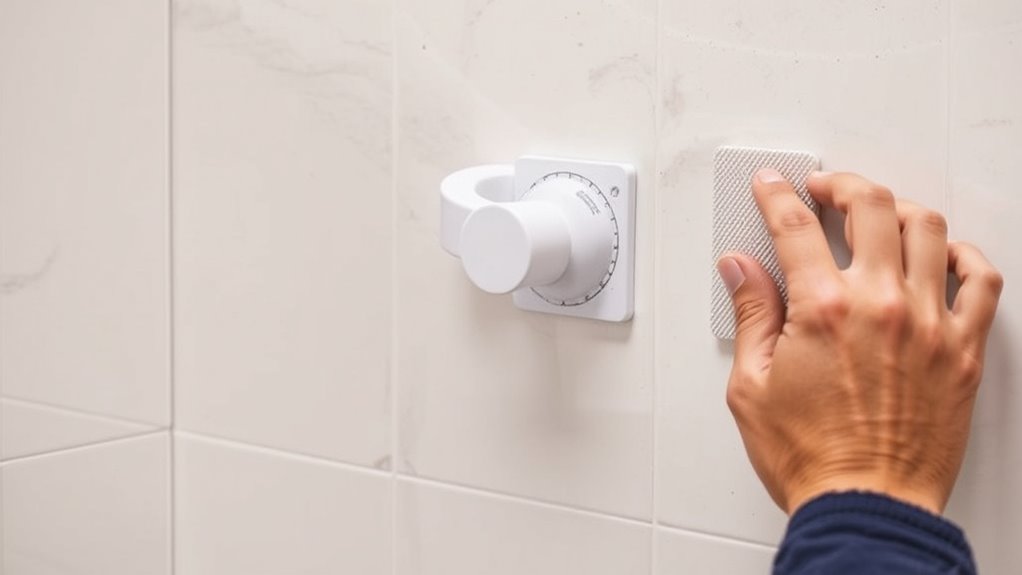
If you’re looking to avoid drilling into your tiles, adhesive mounts offer a practical and damage-free solution. To guarantee secure installation, check the adhesive strength and weight capacity of the mounts. Look for products rated for the weight of your grab bar and designed for bathroom environments.
Consider these tips:
- Choose mounts with high-quality adhesive designed for moist areas
- Clean and dry the surface thoroughly before application
- Allow ample curing time for maximum adhesion before use
Reinforcing Mounting Areas for Extra Support
Reinforcing the mounting areas can substantially boost the stability and safety of your grab bar. To achieve this, consider adding tile reinforcement behind the mounting spots. You can do this by installing a plywood or backer board behind the tile surface, providing extra mounting support. This reinforcement helps distribute the weight more evenly and reduces the risk of tile cracking or loosening over time. When preparing your wall, use appropriate anchors designed for reinforced tile, ensuring the grab bar is securely anchored into a solid backing. This extra support is especially important if you plan to rely heavily on the grab bar for balance. Additionally, understanding hackathons can inspire innovative solutions and techniques for home safety projects like this. Reinforcing your tile not only enhances safety but also prolongs the durability of your installation.
Testing Your Installation for Stability and Safety

Once your grab bar is securely installed, it’s essential to verify its stability to ensure safety. Test the bar by applying gentle but firm pressure in different directions. Check that it feels solid and doesn’t wobble or loosen. Ensure the installation meets the required weight capacity for your needs, preventing accidents. Also, inspect for any signs of corrosion resistance, especially if exposed to moisture, to maintain long-term safety. To confirm stability:
- Gently pull and push on the grab bar to check for movement
- Confirm the mounting hardware is flush against the wall
- Test its weight capacity by applying gradual force without exceeding limits
Additionally, verifying the material choice of your installation area can help prevent future issues related to wear and tear. Performing these steps helps prevent slips or falls, giving you confidence in your installation’s safety.
Maintaining Your Grab Bars to Ensure Longevity

Regularly maintaining your grab bars helps guarantee they stay secure and functional over time. To protect your tile, avoid harsh chemicals and gently clean the bars with a damp cloth. Check the grout sealing around the installation area; well-sealed grout prevents water damage and tile loosening. Staying aware of industry trends can help you identify when upgrades or repairs are needed to keep your installation safe.
Frequently Asked Questions
Can Grab Bars Be Installed on Textured or Uneven Tiles?
You can install grab bars on textured tiles or uneven surfaces, but it requires extra care. Use a stud finder to locate solid mounting points, and choose appropriate anchors designed for textured surfaces. Avoid drilling into weak spots, and consider using longer screws or mounting plates for better stability. With patience and the right tools, you can securely attach grab bars without damaging textured tiles or uneven surfaces.
How Do I Remove or Replace Grab Bars Without Damaging Tiles?
Imagine gently peeling away a delicate sticker, not ripping it apart. To remove or replace grab bars without damaging tiles, use careful removal techniques like loosening anchors gradually and applying heat or penetrating oil. Avoid forceful pulls that cause tile damage. You’re like a skilled artisan, working with precision to preserve your tile’s beauty while updating your grab bars, ensuring your space remains intact and safe.
Are There Specific Tile Types That Are More Suitable for Grab Bar Installation?
Some tile types are better suited for grab bar installation because they tolerate drilling and adhesive use well. Look for ceramic or porcelain tiles, which are durable and less prone to cracking. Use appropriate installation tools like a drill with a tile bit and apply tile sealants to protect surrounding areas. Avoid delicate or soft tiles like glass or natural stone, as they can crack or chip easily during installation.
What Safety Precautions Should I Take During Installation?
Did you know falls in the bathroom are a leading cause of injury among seniors? To stay safe during installation, always prioritize proper tool selection and wear personal protective equipment like gloves and safety glasses. Take your time, double-check your measurements, and guarantee the wall can support the grab bar. These precautions help prevent accidents and protect both you and your bathroom surface during the process.
How Can I Conceal or Repair Any Minor Tile Damage Caused During Installation?
If you notice minor tile damage after installation, start with tile repair by carefully removing any loose or chipped pieces. Use matching grout to touch up the affected area, ensuring it blends seamlessly with the existing grout. Apply the grout touch-up smoothly and let it dry completely. This quick fix restores your tile’s appearance and maintains its durability, making your bathroom look polished and well-maintained.
Conclusion
Think of your grab bars as sturdy branches in a delicate tree. With careful placement and gentle handling, you safeguard the tree’s beauty while strengthening its support. By choosing the right spots, using proper tools, and taking your time, you guarantee your grab bars will stand strong without harming your tiles. Remember, patience and precision turn a tricky task into a solid, reliable anchor—your personal safety tree, thriving for years to come.