
To install a walk-in shower with a low or no lip, you’ll want to plan carefully by adjusting the plumbing and flooring to create a level, seamless surface. Choose durable materials like frameless glass or acrylic panels to enhance accessibility and style. Proper installation guarantees safety and reduces tripping hazards. With the right materials and techniques, you can create a sleek, modern shower that’s easy to enter and maintain—if you continue exploring, you’ll discover all the key steps involved.
Key Takeaways
- Plan for plumbing adjustments to ensure a level, seamless floor transition between the bathroom and shower area.
- Choose durable, waterproof enclosure materials like frameless glass or acrylic for safety and ease of maintenance.
- Ensure proper floor leveling and waterproofing to prevent leaks and enhance the low or no lip shower’s functionality.
- Consider accessibility features, such as barrier-free entry, to improve safety and usability for all users.
- Collaborate with experienced installers to achieve a sleek, modern look while maintaining structural integrity and safety.
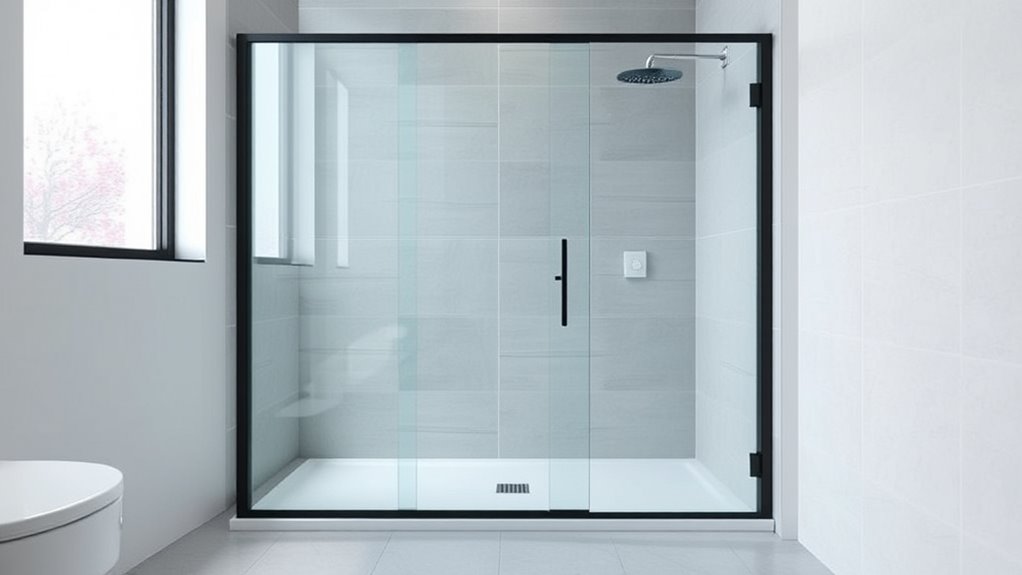
Installing a walk-in shower can instantly update your bathroom, offering a sleek and accessible solution. If you’re considering a tub to shower conversion, switching from a bathtub to a walk-in shower not only modernizes your space but also makes it more functional. One of the key features you’ll appreciate is a low or no lip design, which creates a seamless transition from the bathroom floor into the shower area. This design is especially beneficial if you’re aiming for a more open feel or need easier access for all users.
When planning your walk-in shower, choosing the right shower enclosure materials is essential. You’ll find a variety of options, from glass to acrylic, each with its own advantages. Frameless glass shower enclosures, for example, lend a minimalist look and make the space feel larger. They’re also easier to clean and maintain, giving your bathroom a sleek, modern appearance. On the other hand, acrylic or fiberglass panels are often more affordable and simple to install, especially if you want to keep costs down while still achieving a smooth, low-profile transition.
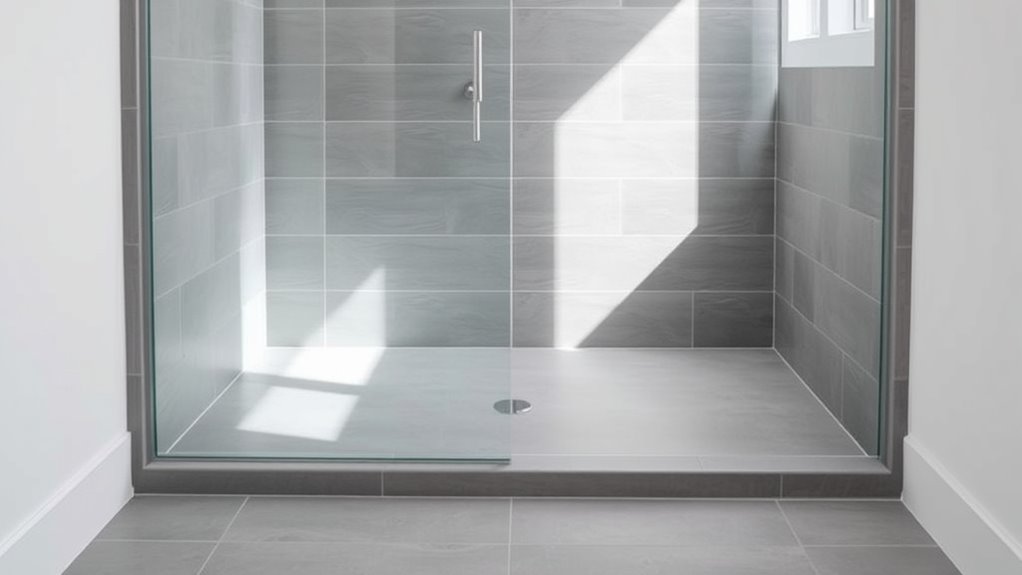
The materials you select play a significant role in achieving a low or no lip design. For instance, some shower enclosures are built flush with the bathroom floor, eliminating any step or threshold. This creates a barrier-free entry, perfect for those with mobility issues or anyone wanting a cleaner aesthetic. When converting from a tub to a shower, you might need to adjust the existing plumbing and floor height to guarantee a flush, level surface. Properly planning for these adjustments ensures your new walk-in shower looks seamless and functions flawlessly. Additionally, understanding the shelf life of materials such as glass and acrylic can help you choose durable options that stand the test of time.
In addition to aesthetics, consider the durability and safety of your chosen materials. Tempered glass is a popular choice because it’s sturdy and resistant to shattering, while acrylic panels are lightweight and less prone to cracking. Always opt for high-quality, waterproof materials that can withstand daily use without warping or deteriorating. The right combination of enclosure materials and a low or no lip entry not only enhances your bathroom’s style but also improves safety by reducing tripping hazards.
Ultimately, installing a walk-in shower with a low or no lip is about creating a space that’s both beautiful and practical. Whether you’re doing a tub to shower conversion or upgrading an existing shower, selecting the right enclosure materials and ensuring a level, accessible entry will give you a bathroom that feels open, modern, and safe. With careful planning and quality materials, your new walk-in shower will serve you well for years to come.
Frequently Asked Questions
How Do I Choose the Best Materials for a Low-Profile Shower?
To choose the best materials for a low-profile shower, prioritize material selection that balances durability and style. Opt for high-quality acrylic or glass for the enclosure, as they’re sturdy and easy to clean. Consider slip-resistant flooring options like textured porcelain tiles for safety. Always keep durability considerations in mind; select waterproof, crack-resistant materials to guarantee your shower lasts. This way, you’ll enjoy a sleek, functional shower that stands up to daily use.
Can I Install a Walk-In Shower Myself or Should I Hire a Professional?
You can try installing a walk-in shower yourself, but beware of DIY challenges like waterproofing and proper sealing that can lead to costly repairs later. If you’re comfortable with plumbing and tile work, you might handle it, but professional installation guarantees quality and saves time. Consider the cost considerations of hiring a pro versus potential mistakes and repairs if you go the DIY route. Prioritize safety and long-term durability.
Are There Specific Drainage Solutions for Low or No Lip Showers?
Yes, there are specific drainage solutions for low or no lip showers. You should use drainage channels that seamlessly integrate with the shower floor, guaranteeing proper water flow. Additionally, applying waterproof membranes around the drain area helps prevent leaks and water damage. Properly installing these components ensures effective drainage while maintaining the sleek, low-profile design of your shower, making it both functional and safe.
How Long Does It Typically Take to Install a Walk-In Shower?
You can expect to spend about one to three days installing your walk-in shower, depending on factors like shower dimensions and complexity. You’ll start by preparing the space, carefully applying waterproofing techniques to prevent leaks. Then, the tiles or panels go in, and fixtures are installed. Rushing this process isn’t worth it—proper setup guarantees durability, comfort, and a sleek look that transforms your bathroom into a spa-like retreat.
What Maintenance Is Required to Keep a Low-Threshold Shower in Good Condition?
To keep your low-threshold shower in good condition, clean it regularly—ideally once a week—with a gentle, non-abrasive cleaner. You should also inspect the sealant every few months for cracks or gaps and reapply sealant as needed to prevent water leaks. Avoid harsh chemicals that can damage surfaces, and dry the area after each use to prevent mold and mildew buildup, ensuring your shower stays in top shape.
Conclusion
Now that you know the key steps to installing a walk-in shower with a low or no lip, you’re almost there. But remember, the final touches can make all the difference—like sealing edges perfectly or choosing the right flooring. One small mistake could turn your sleek design into a leak nightmare. Are you ready to take the last step and transform your bathroom into a stylish, accessible retreat? The perfect shower awaits—just a decision away.