
To improve soundproofing through shared walls, add mass with acoustic panels or vinyl barriers like Mass Loaded Vinyl, or create a decoupled floating wall using resilient channels and insulation. Seal gaps with acoustic sealant or weatherstripping to stop leaks, and place furniture or bookshelves against walls to block sound. Incorporate soft furnishings, hang tapestries, and apply damping compounds like Green Glue for extra control. Keep exploring for more effective DIY tricks that could make a big difference.
Key Takeaways
- Add mass to walls using acoustic panels or Mass Loaded Vinyl to increase density and block sound transmission.
- Decouple walls with resilient channels or sound isolation clips, filling gaps with mineral wool insulation for better soundproofing.
- Seal all gaps and cracks with acoustic sealant or weatherstripping to prevent sound leaks.
- Use soft furnishings, rugs, and wall tapestries to absorb sound and reduce echo within shared spaces.
- Install furniture like bookshelves or storage units against shared walls to act as additional sound barriers.
Adding Mass With Acoustic Panels or Mass Loaded Vinyl
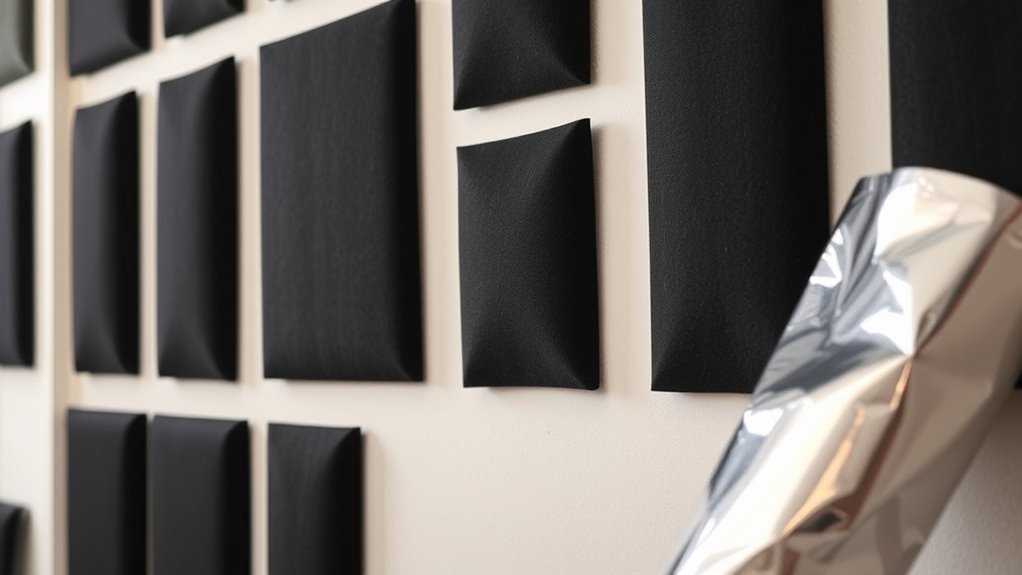
Adding mass to a wall or ceiling is one of the most effective ways to reduce noise transmission. You can achieve this through mass addition techniques like installing acoustic panels or applying vinyl barriers. Acoustic panels add density and dampen sound vibrations, making it harder for noise to pass through. Vinyl barriers, especially mass loaded vinyl (MLV), are dense, flexible materials that you can attach directly to walls or ceilings. They block sound waves more effectively than lightweight materials. Installing these barriers creates a solid barrier that minimizes sound transfer between rooms. Incorporating remote hackathons or virtual collaboration methods can provide innovative ideas for DIY soundproofing projects. Combining mass addition with vinyl barriers is a practical, DIY-friendly approach to improve your space’s acoustics without major renovations. This method is cost-effective and yields noticeable noise reduction, making your environment quieter and more private.
Using Rugs, Carpets, and Soft Furnishings to Absorb Sound

After installing mass-loaded vinyl or acoustic panels, you can further enhance soundproofing by incorporating soft furnishings like rugs and carpets. These items are excellent for sound absorption because they help reduce echoes and dampen noise transfer through shared walls. Thick rugs and plush carpets trap sound waves, preventing them from bouncing around your space. Soft furnishings absorb sound energy rather than reflecting it, creating a quieter environment. Placing rugs under furniture or in high-traffic areas maximizes their effectiveness. Additionally, layering different textures—like a rug over a carpet—can further improve sound absorption. Remember, soft furnishings are a simple, affordable way to boost your overall soundproofing efforts without extensive modifications. They make a noticeable difference in creating a more peaceful shared living space.
Sealing Gaps and Cracks With Acoustic Sealant or Weatherstripping

Choosing the right sealant or weatherstripping is key to blocking sound leaks effectively. Make certain you select products designed for acoustic sealing and compatible with your surfaces. When applying, follow the instructions carefully to ensure a tight, lasting seal that improves your soundproofing. Additionally, selecting materials with a high Sound Transmission Class (STC) rating can further enhance the effectiveness of your soundproofing efforts.
Selecting Proper Sealants
Selecting the right sealant is essential for effectively sealing gaps and cracks that let sound pass through. You need to take into account sealant compatibility with your wall surfaces to ensure a proper bond and durability. Acoustic sealants are designed specifically for soundproofing, so choosing one suited for your application ensures better results. When selecting a sealant, check its flexibility and adhesion properties to prevent future cracks. Application techniques also matter; use a caulking gun for precision and smooth out the sealant for a tight seal. Avoid over-application, which can lead to ineffective coverage. Properly chosen and applied sealant creates a seamless barrier, reducing sound transmission and enhancing your wall’s soundproofing capacity. Additionally, considering soundproofing materials can further improve the effectiveness of your sealant applications.
Applying Effectively for Best Results
To achieve the best soundproofing results, you need to apply acoustic sealant or weatherstripping carefully to all gaps and cracks. Many soundproofing myths suggest that sealing is unnecessary or ineffective, but proper application enhances acoustic treatments’ performance. Focus on thoroughly inspecting shared walls for tiny openings, as even small gaps can considerably reduce soundproofing. Use a caulking gun to apply the sealant smoothly, ensuring it fills every crevice completely. Press weatherstripping tightly around doors and window frames for an airtight seal. Take your time to avoid missed spots. Effective sealing minimizes sound leaks, making your efforts more impactful. Remember, precision in application makes all the difference in transforming your shared wall into a much quieter barrier. Additionally, understanding that soundproofing materials can significantly influence the overall effectiveness helps ensure your efforts are maximized.
Installing Bookshelves and Furniture to Act as Sound Barriers

Placing bookshelves and large furniture strategically against shared walls can considerably reduce noise transfer between rooms. Focus on ideal bookshelf placement to maximize sound absorption; positioning tall, dense shelves directly on or adjacent to the wall helps dampen sound waves. When arranging furniture, opt for bulky pieces like armoires or storage units that fill wall space effectively. Mix in softer items like fabric-covered chairs or cushions to further absorb sound. Proper furniture arrangement creates multiple layers that act as barriers, disrupting sound pathways. Avoid gaps or spaces behind furniture that could allow noise to pass through. Additionally, understanding soundproofing principles can help you optimize your setup for better noise reduction. By thoughtfully combining bookshelf placement with strategic furniture positioning, you can greatly diminish noise transmission without major renovations. This approach provides an affordable, practical solution for shared wall soundproofing.
Creating a Floating Wall or Decoupling the Structure

Creating a floating wall or decoupling the structure involves building a barrier that minimizes direct contact between the noisy wall and the rest of your space. A floating wall is constructed separately from the existing wall, preventing sound vibrations from transferring directly. To create a decoupling structure, you start by building a frame that doesn’t touch the original wall, using resilient channels or sound isolation clips. Fill the space with soundproof insulation, such as mineral wool, to absorb noise. Attach drywall to the decoupled frame, ensuring it’s isolated from the existing wall. This method reduces the transmission of sound vibrations, making your space quieter. Incorporating soundproof insulation can further enhance noise reduction. By decoupling the structure, you effectively create a barrier that dampens noise, considerably improving soundproofing in shared wall situations.
Applying Soundproof Window Inserts or Curtains
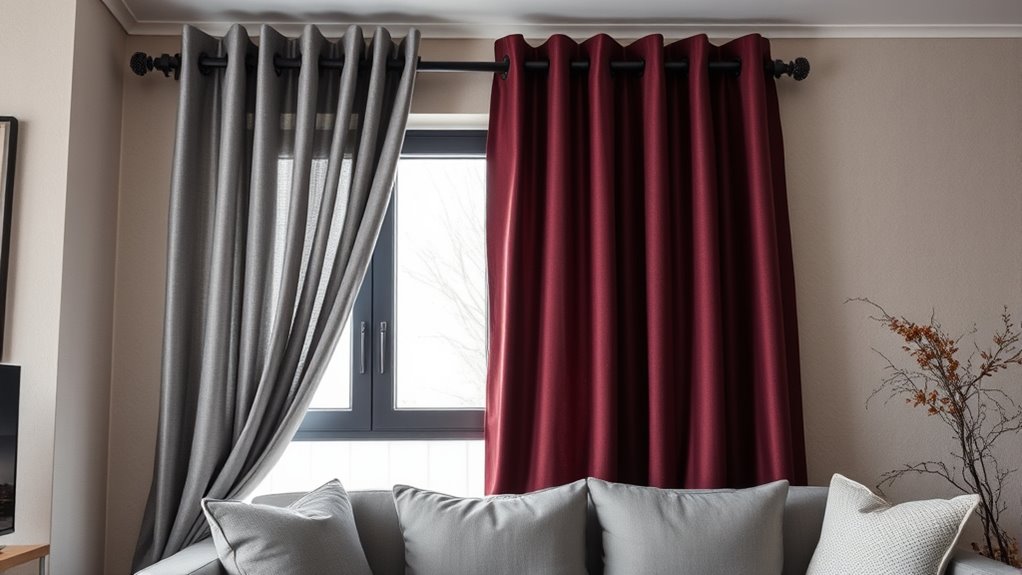
Have you considered adding soundproof window inserts or curtains to substantially reduce noise? These simple solutions can make a big difference. Installing window inserts that fit snugly inside your existing frames creates an extra barrier against sound. Hang soundproof curtains made from dense, multi-layered fabrics to dampen noise coming through windows. Keep the inserts or curtains closed during noisy times for maximum effect. Use magnetic or suction-mounted inserts for easy removal and storage when not needed. Both options improve sound insulation without major renovations. Window inserts provide a clear, transparent barrier, while soundproof curtains add a flexible, fabric layer. Combining these can boost your overall soundproofing efforts. For enhanced effectiveness, consider the soundproofing materials used in these solutions, which are designed to absorb and block sound waves more efficiently.
Using Green Glue or Damping Compounds Between Wall Layers

Adding soundproof window inserts or curtains helps reduce noise through your windows, but to target sound transmission through walls, applying damping compounds like Green Glue can be highly effective. These compounds absorb vibrations and control resonance, minimizing sound transfer between rooms. When you apply Green Glue between two wall layers, it acts as a damping barrier, reducing vibration damping and resonance within the structure. This method is especially useful in shared walls, as it dampens sound vibrations at their source. Use the table below to understand how damping compounds improve soundproofing:
| Layer 1 | Damping Compound | Layer 2 |
|---|---|---|
| Drywall | Green Glue | Existing Wall |
| Vibration Damping | Resonance Control | Sound Transmission |
| Additional Layer | Vibration Damping | Reduced Noise |
| Wall Assembly | Resonance Control | Better Insulation |
| Soundproofing | Damping | Enhanced Quietness |
Furthermore, selecting the right damping compound can also contribute to acoustic comfort in your living space.
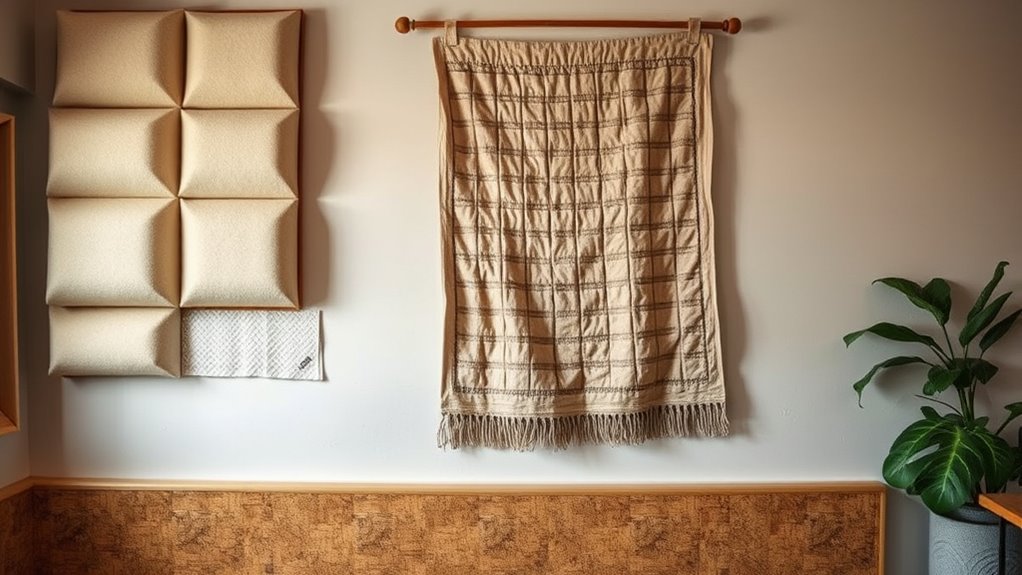
Hanging Wall Art and Tapestries to Reduce Echo and Sound Transmission

Hanging wall art and tapestries can considerably absorb sound waves, reducing echo and improving room acoustics. They act as decorative sound barriers that prevent noise from bouncing around your space. By choosing the right pieces, you can enhance both your room’s style and its soundproofing effectiveness. Incorporating vibrational absorption techniques with your decor can further improve sound quality and create a more peaceful environment.
Absorbing Sound Waves
To effectively reduce echo and sound transmission, hanging wall art and tapestries can be powerful tools. They help absorb sound waves, preventing resonance amplification and reducing sound wave reflection. When you hang textured fabrics or thick artwork, you disrupt the path of sound waves bouncing around the room. Consider these options:
- Large, plush tapestries that absorb multiple frequencies
- Framed fabric art with dense materials
- Quilted wall hangings that diffuse sound energy
- Multi-layered textiles for increased sound absorption
These items break up sound wave reflection, lowering echo and minimizing resonance amplification. By choosing dense, soft materials, you create a buffer that dampens vibrations, making your space quieter and more comfortable. Proper placement and layering amplify these effects, enhancing your soundproofing efforts. Incorporating modern decor elements can also help improve the acoustic environment while maintaining aesthetic appeal.
Decorative Sound Barriers
Decorative wall art and tapestries serve as effective sound barriers that can considerably cut down on echo and sound transmission. These decorative sound barriers not only enhance your room’s appearance but also provide aesthetic acoustic solutions that improve sound quality. Hanging large tapestries or fabric wall hangings absorbs sound waves, reducing echo and preventing noise from traveling through shared walls. Choose pieces with thick, textured materials for maximum impact. Artworks with soft fabrics or layered textiles work best to dampen sound while adding visual interest. By integrating these decorative sound barriers into your space, you create a more comfortable environment without sacrificing style. This simple, DIY approach offers an affordable way to tackle noise issues while elevating your decor.
DIY Soundproofing With Green Glue, Resilient Channels, and Drywall

Want to reduce noise effectively? Start with these DIY techniques:
- Apply Green Glue between drywall layers for maximum dampening. Spread it evenly during installation to absorb sound vibrations.
- Install resilient channels on the existing wall studs to decouple the drywall from the structure, reducing sound transmission.
- Hang a new drywall layer onto the resilient channels, ensuring a tight fit without gaps.
- Finish with secure Green Glue application and proper drywall sealing.
Frequently Asked Questions
Can Plants Help Reduce Noise Through Shared Walls?
Plants can help reduce noise through shared walls by adding indoor greenery that acts as natural plant insulation. When you place lush, thick plants near your shared walls, they absorb and diffuse sound waves, creating a quieter environment. While plants alone won’t completely soundproof a space, they contribute to better noise reduction and improve air quality, making your home more peaceful and inviting.
How Effective Are DIY Soundproofing Methods Long-Term?
Think of DIY soundproofing like planting a garden—you need patience and care for long-term blooms. Your DIY methods can be effective initially, but their soundproofing durability might not match professional solutions over time. DIY soundproofing is budget-friendly and easy to customize, yet it often falls short in longevity. For lasting results, consider professional options, but if you’re committed, consistent DIY efforts can still considerably reduce noise long-term.
What Are the Best Materials for Soundproofing Apartment Walls?
You’re looking for the best materials to soundproof apartment walls. Acoustic panels are great for absorbing sound and reducing echo, while mass loaded vinyl adds mass to block noise transmission effectively. Combining these materials enhances soundproofing, especially in shared spaces. You should install acoustic panels on walls to absorb sound energy and use mass loaded vinyl behind drywall or inside wall cavities to prevent noise from passing through.
Is It Possible to Soundproof Without Professional Assistance?
Yes, you can soundproof your walls without professional help through DIY installation. Start by adding acoustic barriers like mass-loaded vinyl or dense foam panels to absorb sound. You’ll want to seal gaps and cracks with soundproofing sealant for better results. While it takes some effort, these DIY tricks make a noticeable difference, and you don’t need specialized skills to improve your space’s acoustics effectively.
How Do I Measure the Effectiveness of My Soundproofing Efforts?
To measure how well your soundproofing works, you can use a decibel meter to gauge sound levels before and after your efforts. Conduct a sound level comparison by recording noise at different times or using various sound sources. This helps you identify if your improvements reduce noise, ensuring your DIY measures are effective. Regular testing with a decibel meter provides clear, objective feedback on your soundproofing success.
Conclusion
By trying these DIY tricks, you can turn your shared walls into a fortress of silence. Think of your space as a sponge soaking up sound—each method adds a layer of protection, making noise slip away like water. With a little effort and creativity, you’ll create a peaceful oasis where conversations stay inside and noise stays out. Your home will become a serene sanctuary, quiet as a whisper in a library.