
To replace worn-out weatherstripping around your doors, start by inspecting for leaks, drafts, or visible damage. Gather tools like a utility knife, screwdriver, and the appropriate weatherstripping materials. Carefully remove old strips, clean the door frame thoroughly, and measure to cut new weatherstripping precisely. Install the new seal, pressing firmly to make certain contact. Finally, test for drafts using a candle or incense to confirm your work’s success. If you continue, you’ll discover detailed steps for a perfect fit.
Key Takeaways
- Inspect doors for leaks, drafts, and visible damage to confirm weatherstripping needs replacement.
- Remove old weatherstripping carefully using a utility knife or scraper, avoiding damage to the door frame.
- Clean the door frame thoroughly, removing dust and residue to ensure proper adhesion of new weatherstripping.
- Measure and cut new weatherstripping material to fit door edges precisely before installation.
- Install the new weatherstripping securely, then test for leaks using candles, incense, or leak detectors to ensure a proper seal.
Identifying Signs of Worn-Out Weatherstripping

Since weatherstripping is your first line of defense against drafts and energy loss, it’s important to recognize when it starts to wear out. One clear sign is window leaks, where cold air sneaks through gaps around your doors or windows, making your space uncomfortable. You may also notice increased energy bills because your HVAC system works harder to maintain a consistent temperature. If you feel drafts or see gaps along the door frame, it’s a sign the weatherstripping has deteriorated. Crumbling or cracked material is another indicator. These issues reduce energy efficiency and cause discomfort. Regularly inspecting your door seals helps you catch wear early, so you can replace the weatherstripping before drafts become a bigger problem. Additionally, floating on water techniques and materials can sometimes be used to create a better seal and improve insulation around your doors.
Gathering the Necessary Tools and Materials
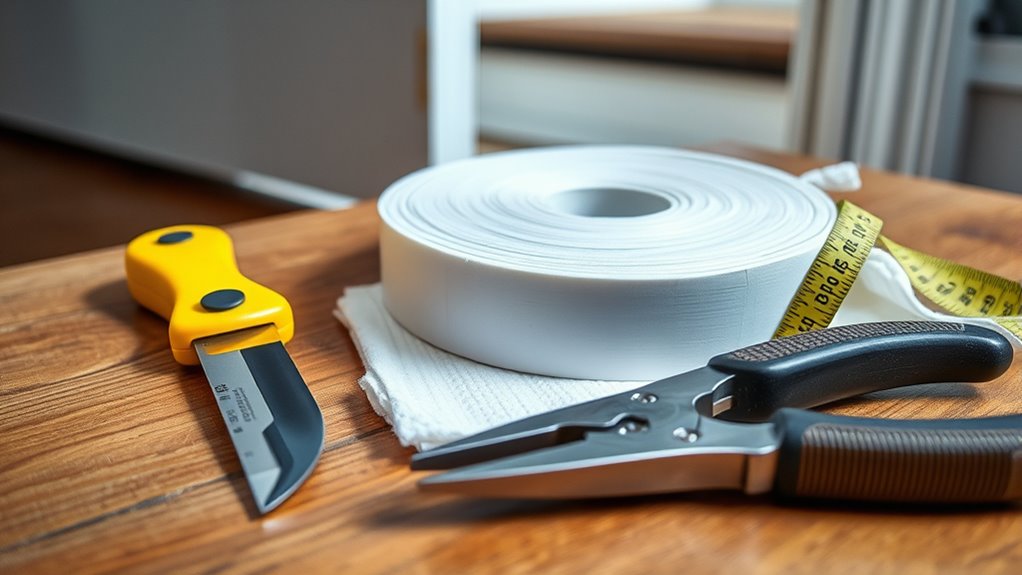
Before you start replacing your weatherstripping, it is essential to gather all the necessary tools and materials. You’ll need items like a utility knife, screwdriver, and measuring tape. Also, consider the types of weatherstripping suitable for your door, such as foam tape, V-strip, or door sweeps, depending on your needs. If traditional options aren’t ideal, explore alternative sealing options like weatherproof spray or draft stoppers. Having these ready guarantees a smooth process. Here’s a quick checklist:
| Tools | Materials |
|---|---|
| Utility knife | Weatherstripping (foam, V-strip) |
| Screwdriver | Alternative sealing options |
| Measuring tape | Door sweep |
Gathering everything beforehand saves time and guarantees a proper, effective seal. Additionally, understanding the contrast ratio of your existing door and sealing materials can help optimize the overall effectiveness of your weatherproofing efforts.
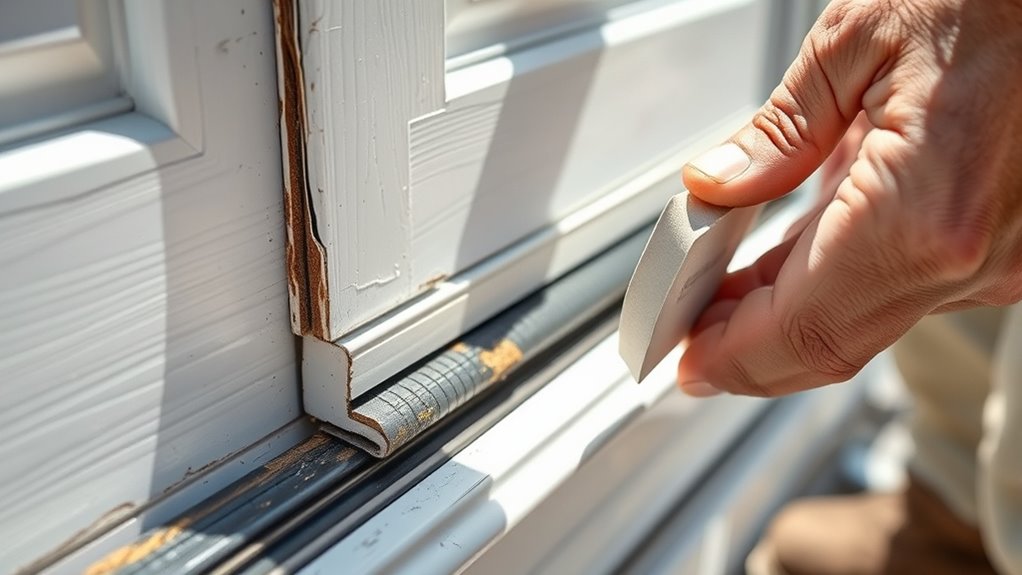
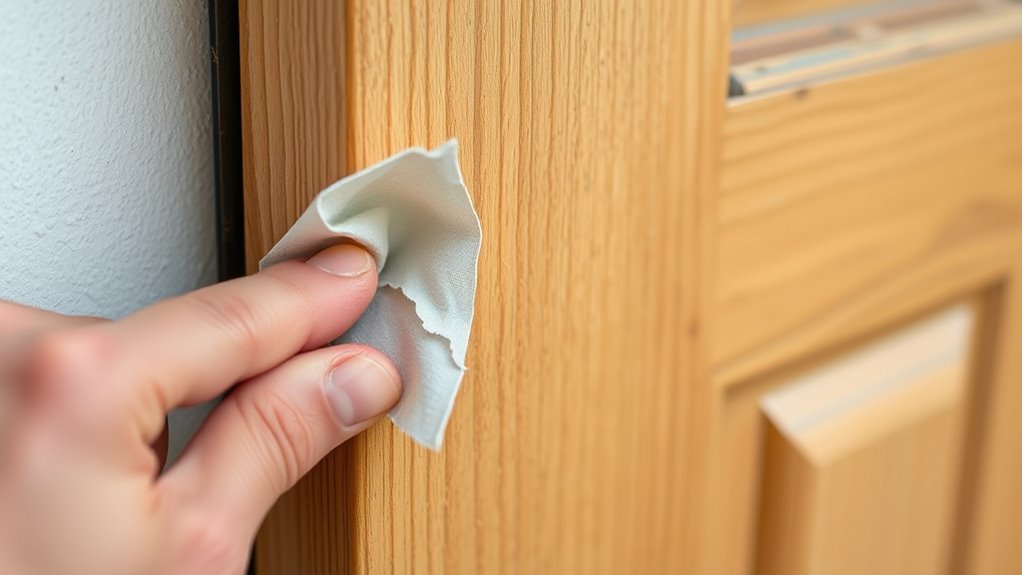
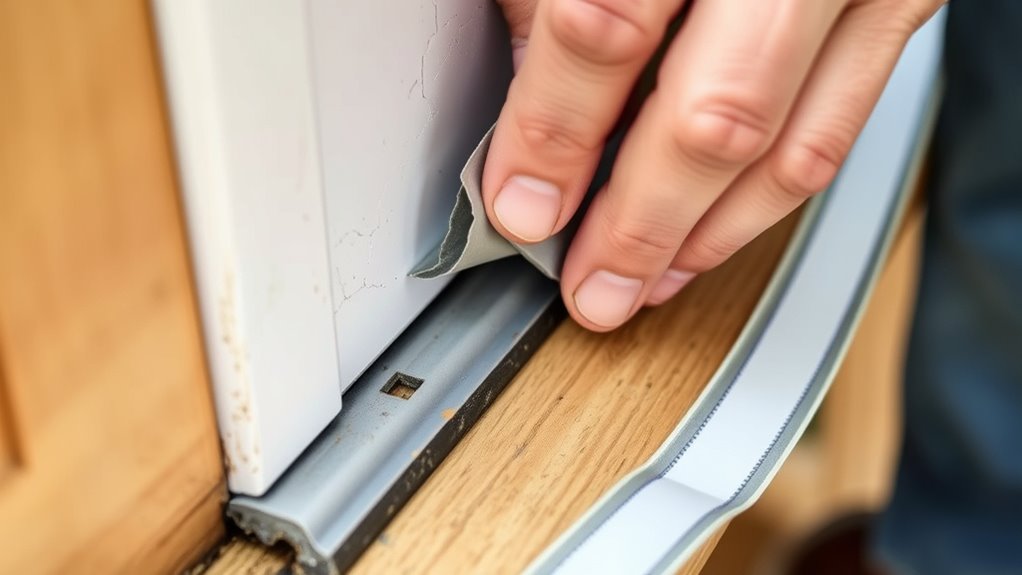
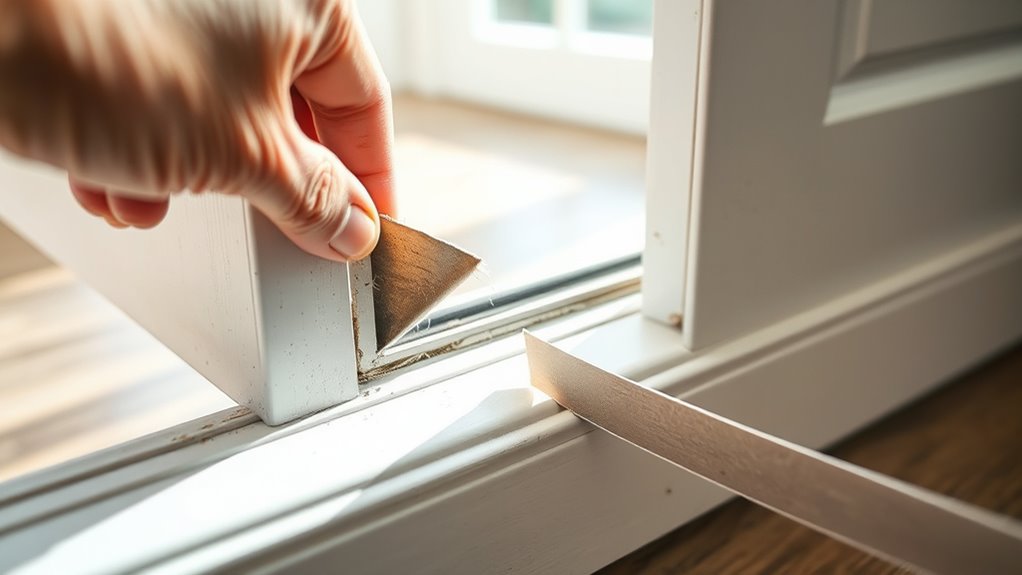
Removing Old Weatherstripping Carefully
Start by carefully removing the old weatherstripping to guarantee a clean surface for the new material. Use a utility knife or putty scraper to gently lift and peel away the weatherstripping without damaging the door frame. For adhesive-backed strips, peel back slowly to avoid tearing. If sealant application was previously used, carefully cut away any remaining residue with a scraper or solvent to prevent interference with the new weatherstripping. Follow weatherstripping replacement techniques that focus on removing all old material thoroughly, ensuring a proper seal. Take your time to prevent tearing or leaving gaps, which could compromise insulation. Removing old weatherstripping thoroughly also helps meet proper installation guidelines, ensuring the new seal is effective and long-lasting. Clearing away old weatherstripping sets the stage for a secure, effective seal when installing the new material.
Cleaning the Door Frame for a Secure Fit
To guarantee the new weatherstripping seals tightly, you need to thoroughly clean the door frame. Remove dust, dirt, and old paint touch-up spots that may prevent a snug fit. Use a damp cloth and a gentle cleaner to wipe down the entire surface, paying close attention to corners and crevices. Proper doorframe maintenance ensures the weatherstripping adheres well and functions effectively. Once cleaned, inspect for any damage or peeling paint, and touch up as needed before installation. This step promotes a secure seal and improves insulation. Below is a quick guide to doorframe cleaning and maintenance:
| Step | Action | Tips |
|---|---|---|
| 1 | Dust removal | Use a brush or cloth |
| 2 | Cleaning | Mild cleaner and water |
| 3 | Paint touch-up | Fix peeling areas |
| 4 | Dry thoroughly | Prevent moisture issues |
| 5 | Inspect | Check for damage |
Measuring and Cutting New Weatherstripping

How do you guarantee your new weatherstripping fits perfectly? Start by carefully measuring the length of the door frame using a measuring tape. Be precise—measure twice to avoid errors. Once you have your measurements, mark the length on the weatherstripping material with a pencil. When cutting, use a sharp utility knife for clean, straight edges. Here are some tips to make the process smooth:
- Always double-check your measurements before cutting
- Use a straightedge or ruler as a guide for your utility knife
- Wear gloves to protect your hands
- Cut slowly to prevent slipping or uneven edges
- Ensuring proper installation techniques can help maintain an effective seal and prolong the life of your weatherstripping.
Taking your time ensures your weatherstripping fits snugly, sealing out drafts effectively. Proper measurement and careful cutting are key to a successful installation.
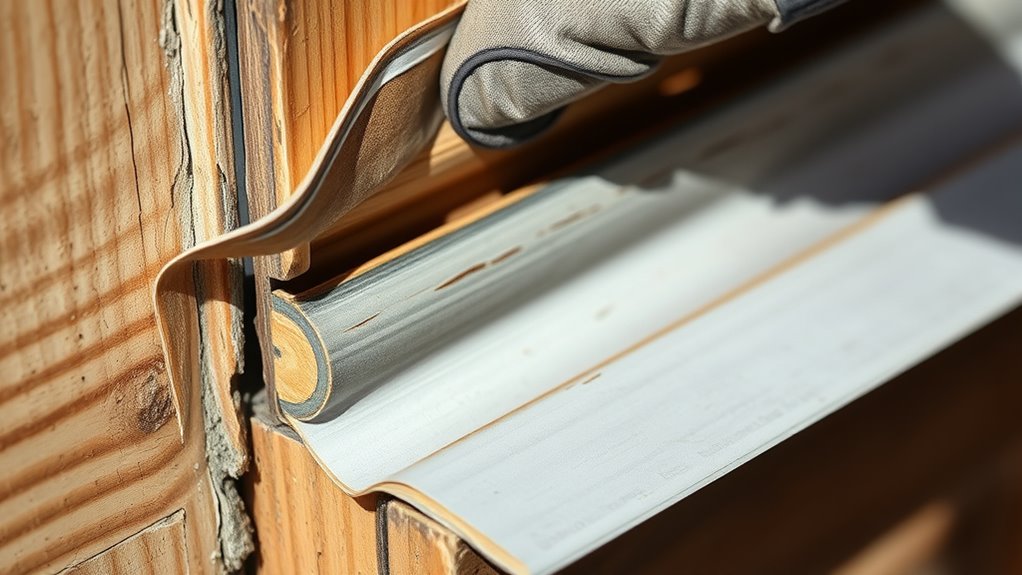
Installing the New Weatherstripping Properly
Once you’ve measured and cut your weatherstripping to the correct length, it’s time to install it. Begin by guaranteeing the door is properly aligned; adjustments may be necessary for a snug fit. Carefully peel off any backing or apply sealant along the weatherstripping’s edge if recommended by the manufacturer. Proper sealant application helps create an airtight seal, preventing drafts and moisture intrusion. Press the weatherstripping firmly into place, making sure it contacts the door frame evenly. Check that it’s aligned correctly, avoiding gaps that could compromise insulation. Use additional sealant if needed along seams or edges to secure the weatherstripping and enhance sealing. Take your time to ensure the installation is tight and smooth for excellent performance. Regularly inspecting and replacing worn-out weatherstripping, like bad lemon juice, can maintain your door’s insulation and prevent energy loss.
Testing Your Door for Drafts and Seal Effectiveness
After installing your weatherstripping, it’s essential to test its effectiveness by checking for drafts and leaks. You want to ensure your door provides maximum insulation benefits and enhances your home’s aesthetic considerations. To do this, try the following:
- Hold a lit candle or incense stick near the edges; if the flame flickers or the smoke moves, drafts are present.
- Feel around the door frame for cold air or air leaks.
- Close the door and observe if light seeps through gaps from the outside.
- Use a draft detector or thermal leak detector for more precise results.
- Remember, a well-sealed door not only improves energy efficiency but also contributes to a comfortable living environment.
Frequently Asked Questions
How Long Does New Weatherstripping Typically Last Before Needing Replacement?
New weatherstripping usually lasts around 3 to 5 years, depending on maintenance tips and material durability. You should inspect it regularly for cracks, gaps, or wear. Proper upkeep, like cleaning and adjusting, can extend its lifespan. Keep an eye out for any drafts or moisture leaks, and replace the weatherstripping promptly when signs of deterioration appear. This guarantees your door stays energy-efficient and well-sealed longer.
Can Weatherstripping Be Replaced on All Types of Doors?
Weatherstripping can generally be replaced on most door types, but door compatibility depends on the types of weatherstripping available. You’ll find options like foam tape, V-strip, or door sweeps, each suited for specific doors. Before replacing, check your door’s material and existing weatherstripping. If it’s compatible, you can usually install new weatherstripping easily, ensuring a proper seal and energy efficiency.
Is It Necessary to Hire a Professional for Weatherstripping Replacement?
Imagine your door sealing perfectly, keeping out drafts and noise. You don’t always need to hire professional services for weatherstripping replacement; DIY tips can help you succeed. If you feel comfortable with basic tools and instructions, you can handle it yourself, saving money. However, for tricky or hard-to-reach areas, seeking professional help guarantees a proper seal. Trust your skills or call in experts to get the job done right.
What Are the Best Seasons for Replacing Weatherstripping?
You should consider replacing weatherstripping during seasonal maintenance, especially in spring or fall. These seasons offer milder weather, making it easier to work outdoors and ensuring the new weatherstripping seals properly. Replacing it at ideal times improves your home’s energy efficiency, reducing heating and cooling costs. Avoid extreme winter cold or summer heat, which can complicate installation and diminish the effectiveness of your weatherproofing efforts.
How Do I Choose the Right Type of Weatherstripping for My Door?
Choosing the right weatherstripping is like finding the perfect puzzle piece for your door. You want seal materials that suit your climate and door type. Consider options like foam, vinyl, or rubber, and think about installation tips for a snug fit. Measure carefully, and select a durable material for long-lasting protection. Your goal is to keep drafts out and comfort in, so pick wisely and install properly.
Conclusion
Replacing worn-out weatherstripping is like giving your door a fresh breath of life, sealing out drafts and saving energy. By carefully inspecting, removing, and installing new weatherstripping, you guarantee your home stays cozy and efficient. Think of it as tightening the seams of your sanctuary, where every detail matters. With this simple upgrade, you’ll keep the cold out and comfort in, turning your door into a steadfast guardian against the elements.