To install solar-powered path lights in one afternoon, start by gathering your tools and materials like screwdrivers, wire cutters, and mounting brackets. Plan where to place each light, ensuring they’re in spots with maximum sun exposure and even spacing. Clear and level the ground before installing, then position and secure the lights, making sure solar panels face the sun. Test the lights at night and adjust as needed. Keep your landscape attractive and maintained for long-lasting results—more tips await as you continue with your project.
Key Takeaways
- Gather all tools, materials, and solar lights beforehand to streamline the installation process.
- Plan and mark light placement along the pathway, considering sun exposure and even coverage.
- Position solar panels in direct sunlight and install lights securely on level ground.
- Adjust angles and test lights after dark to ensure proper illumination and performance.
- Perform quick maintenance checks, such as cleaning panels and securing connections, for long-lasting results.
Gathering Your Tools and Materials

Before you begin installing your solar-powered path lights, it’s essential to gather all the necessary tools and materials. Start by collecting a screwdriver, wire cutters, and a drill, as these will make installation easier. You’ll also need the solar lights themselves, ensuring they have the appropriate battery capacity to power them through the night. Check that each solar panel is properly oriented—aiming it toward the sun for maximum exposure—so your lights charge efficiently. Make sure you have enough stakes or mounting brackets for secure placement along your pathway. Having everything ready beforehand prevents interruptions and helps you work smoothly. With your tools and materials organized, you’ll be set to install your solar path lights confidently and efficiently. Additionally, understanding industry trends can help you choose the most efficient and durable solar lights for your needs.
Planning Your Light Placement

Start by mapping out where you want your lights to go, focusing on pathways and key features. Make sure to contemplate how much sun each spot gets throughout the day, so the lights can charge properly. Aim for a balanced layout that evenly illuminates your space without creating dark spots or overly bright areas. Utilizing self-watering plant pots as an analogy, consider how consistent placement and watering contribute to healthy growth, much like maintaining an even light distribution enhances your landscape’s appearance.
Map Out Desired Areas
Mapping out the desired areas is a essential first step in planning your solar-powered path lights. First, identify walkways, garden borders, or steps you want illuminated. Consider how much light each area needs to guarantee safety and ambiance. When planning, think about solar panel positioning; placing panels where they’ll receive maximum sunlight is key for best performance. Also, decide on your light color selection to match your outdoor aesthetic and mood preferences. Bright white lights create a modern look, while softer tones offer a cozy feel. Use stakes or chalk to mark your chosen spots, visualizing how the lights will look once installed. By carefully mapping these areas, you’ll guarantee your path lights provide effective illumination and enhance your outdoor space. Additionally, understanding the best placement strategies can significantly improve the efficiency and brightness of your solar lights.
Consider Sun Exposure
Since solar-powered path lights rely on sunlight to charge, evaluating sun exposure is crucial for peak performance. You want your lights to shine brightly all night, so consider the sunlight duration in your area. Choose spots that receive direct sunlight for most of the day, avoiding shaded areas caused by trees, buildings, or fences. Proper placement ensures your lights are fully charged and bright when you need them.
Think about these factors:
- Maximize sunlight hours to keep your lights glowing longer
- Avoid shade considerations that limit charging efficiency
- Position lights where they’ll get unobstructed sun during peak hours
- Monitor seasonal sun changes to adjust placement if necessary
Proper planning guarantees your path lights stay vibrant and effective, illuminating your outdoor space beautifully.
Balance Light Distribution
Achieving balanced illumination along your pathway involves thoughtful placement of your solar-powered lights to guarantee even coverage. To do this, consider how fixture positioning affects light diffusion, ensuring each light covers its intended area without gaps or overlaps. Place fixtures at consistent intervals, roughly 6 to 8 feet apart, to promote uniform light distribution. Aim for ideal fixture positioning so that each light’s beam overlaps slightly with neighboring lights, preventing dark spots. Pay attention to how the light diffuses from each fixture; adjusting height or angle can improve evenness. Proper spacing and fixture placement help create a smooth, inviting glow along your path, making it both safe and visually appealing. Additionally, considering the light diffusion characteristics of your fixtures can further enhance the overall illumination pattern. Ultimately, careful planning ensures your pathway is evenly lit and beautifully illuminated.
Preparing the Soil and Ground
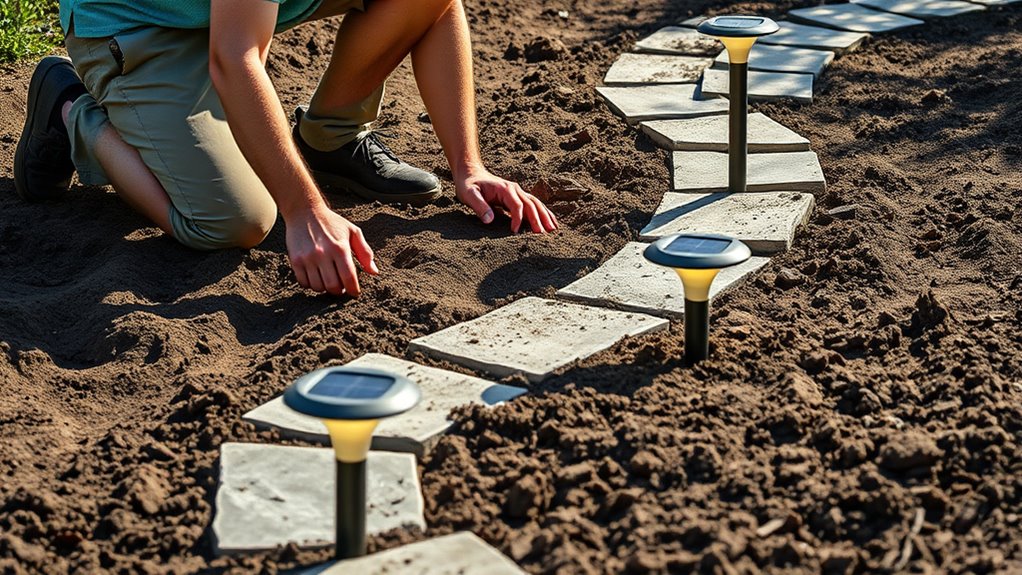
Start by clearing the area where you’ll install your lights to remove any plants or debris. Next, level the soil surface to guarantee stability and proper placement. Finally, amend and compact the ground to create a firm, even foundation for your path lights. Incorporating celebrity lifestyle insights can also offer ideas on designing attractive and functional outdoor spaces.
Clear the Plant Area
Before installing your solar-powered path lights, you need to clear the plant area to guarantee a smooth setup. Proper plant clearance not only simplifies installation but also enhances the space’s aesthetic appeal. As you clear the area, imagine transforming a cluttered, overgrown patch into a charming walkway that invites admiration and joy. This step allows you to create a clean, defined space that highlights your garden’s beauty. Removing excess plants prevents future tripping hazards and gives your outdoor area a fresh, polished look. Focus on clearing weeds, stray branches, and overgrown foliage to achieve a neat, inviting path. With a tidy area, your lights will shine brighter, making your yard feel welcoming and beautifully maintained.
Level the Soil Surface
With the plant area cleared and looking neat, the next step is to prepare a stable, even surface for your path lights. Start by inspecting the ground and removing any remaining debris or uneven patches. Use a garden rake or leveling tool to perform soil leveling, ensuring the surface is flat and consistent. Focus on ground smoothing to eliminate bumps or dips that could cause instability or uneven light placement. If necessary, add or remove soil to achieve a uniform height across the entire area. Aim for a slight slope away from structures for proper drainage, but keep the overall surface as level as possible. This preparation creates a solid foundation, helping your solar path lights stay securely in place and operate efficiently. Incorporating landscape grading techniques can further improve water runoff and stability for your lighting project.
Amend and Compact Ground
To guarantee your solar path lights stay secure and function properly, you need to amend and compact the ground. Start by leveling the soil surface, then amend ground with soil or gravel to improve stability. Once the area is prepared, compact soil firmly to prevent shifting or sinking. Properly amended and compacted ground ensures your lights stay upright and in place. Creating a stable foundation helps your lights withstand weather and foot traffic over time. Imagine walking along a clear, steady path, feeling confident that your lights will shine brightly all night. Take these steps to create a sturdy foundation:
- Feel the satisfaction of a perfectly installed pathway
- Enjoy the beauty of a neat, professional look
- Trust your lights will endure over time
- Experience the peace of knowing your investment is protected
Installing the Solar Path Lights

Have you ever wondered how simple it is to set up solar path lights? First, position the solar panel in a spot that gets direct sunlight for most of the day. This ensures the batteries charge fully and your lights stay bright at night. Next, install the lights along your desired pathway, making sure they’re firmly anchored in the ground. You can choose from different light color options—warm white for a cozy glow or cool white for a modern look. Keep in mind, the direction of the solar panel influences brightness, so angle it to maximize sun exposure. Once installed, double-check that each light is stable and facing the right way. Proper GMC tuning can also enhance your vehicle’s performance and efficiency, just like careful placement improves your solar lighting. With these steps, you’ll have your solar path lights shining beautifully in no time.
Adjusting and Testing the Lights

Once your solar path lights are installed, it’s time to make sure they perform at their best. Start by checking the solar panel orientation—ensure it faces the sun directly, free of shade, to maximize energy. Next, test each light after dark to see how well it illuminates your pathway. Adjust the light brightness if your model allows, setting it to a level that feels welcoming yet functional. Keep an eye out for these key moments:
Ensure solar panels face the sun and test lights at night for optimal pathway illumination.
- The lights turn on automatically and stay on through the night.
- The brightness matches your desired ambiance.
- The solar panel captures enough sunlight during the day.
- The lights stay steady and don’t flicker or fade prematurely.
Monitoring these factors helps ensure your automation technology functions effectively and enhances your outdoor lighting experience.
Enhancing Your Landscape With Additional Features

Adding complementary features to your solar path lights can substantially enhance your landscape’s beauty and functionality. You can create captivating garden aesthetics and elevate the outdoor ambiance by combining elements like decorative stones or planting low shrubs along the path. Consider adding a water feature or small sculptures to draw attention and add interest. These features complement your lights, making your outdoor space more inviting and visually appealing. Incorporating visual storytelling through these features can further showcase your leadership in landscape design.
Maintenance Tips for Longevity

To guarantee your solar path lights stay bright and functional for years to come, regular maintenance is essential. Proper battery maintenance ensures they store energy efficiently, so check and replace batteries when needed. Regular cleaning removes dirt and debris that can block sunlight and decrease performance. Additionally, keep the solar panels free of dust and leaves, especially after storms. To maintain longevity, consider these tips:
Regular cleaning, battery checks, and trimming plants keep your solar path lights shining bright for years.
- Clean solar panels gently with a soft cloth
- Check battery connections periodically
- Trim nearby plants to prevent shading
- Store lights indoors during winter to prolong life
Frequently Asked Questions
Can I Install Solar Path Lights on Uneven Terrain?
You can install solar path lights on uneven terrain by using ground leveling techniques to create a stable surface. If leveling isn’t possible, consider wireless options like stake-mounted lights that adapt easily to irregular ground. Just confirm you position the lights securely to prevent shifting and maximize sun exposure. Proper ground preparation makes installation smoother and helps your solar lights stay functional and attractive despite uneven terrain.
What Is the Ideal Orientation for Maximum Sunlight Exposure?
Your path lights’ solar panel angle is the secret to a dazzling glow that outshines the stars. To maximize sunlight hours, face the solar panel true south (or north if you’re in the southern hemisphere). Tilt it at an angle equal to your latitude for maximum exposure. This ensures your lights soak up sunlight all day, transforming your walkway into a radiant pathway that could rival the sun itself.
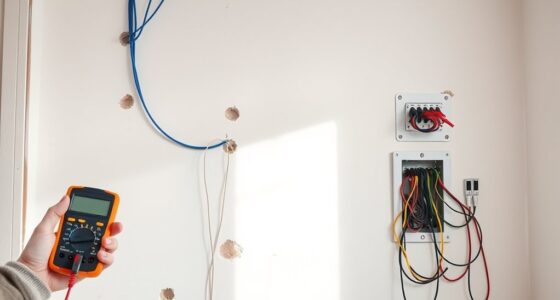
Are There Any Safety Precautions During Installation?
During installation, you should prioritize electrical safety by turning off power sources and handling wiring carefully. Make sure to follow weather precautions; avoid installing lights during rain or snow to prevent slips and electrical hazards. Use proper tools and wear protective gear. Double-check connections and secure the lights firmly. Staying alert to these safety tips helps prevent accidents and guarantees your solar path lights are installed safely and effectively.
How Do I Troubleshoot if Lights Aren’T Turning On?
Think of your solar path lights as dancers needing the right cues. If they don’t turn on, check your battery maintenance first—ensure batteries are fully charged and properly connected. Then, inspect the sensor adjustment, making sure they’re not shaded or blocked. Sometimes, a simple clean or repositioning can revive their sparkle. Troubleshooting is like guiding a dance—small adjustments can bring your lights back to life.
Can I Upgrade or Add More Lights Later Easily?
Yes, you can upgrade or add more solar-powered path lights later. Simply choose compatible lights to match your existing system’s voltage and style. If brightness decreases over time, consider replacing the battery to restore brightness and performance. Adding more lights is straightforward—just connect them to your existing setup, ensuring proper placement for ideal sunlight. This flexibility makes it easy to expand and maintain your pathway lighting easily.
Conclusion
With just an afternoon, you can transform your yard into a welcoming, illuminated space. Don’t worry if your first setup isn’t perfect—adjusting the lights and testing their placement makes all the difference. Imagine strolling along your newly lit path, where each light highlights your landscape beautifully. With a little planning and effort, your outdoor area becomes cozy and inviting, all without breaking the bank or taking up your whole day.