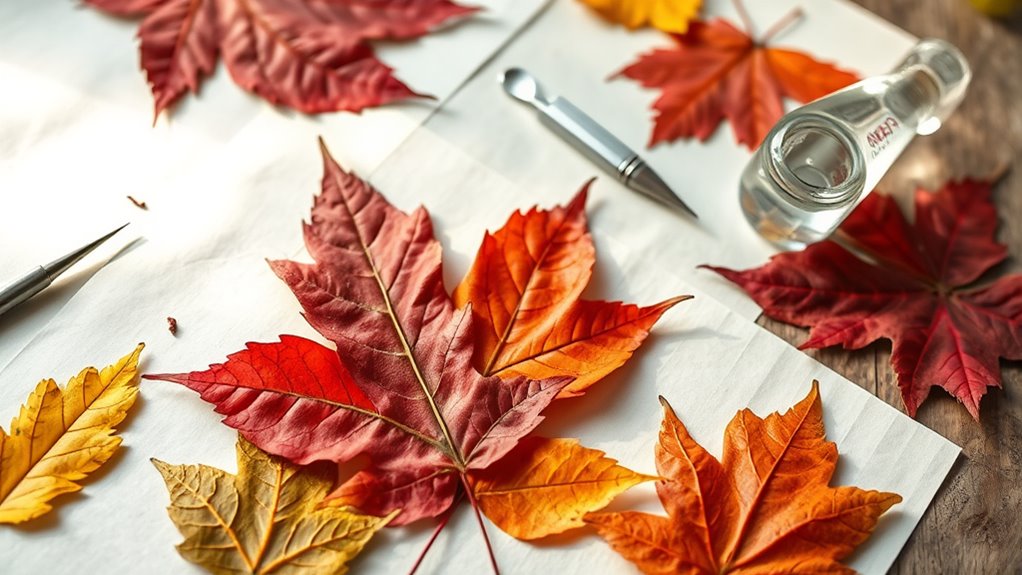
To create a fall leaf pressing craft, start by choosing vibrant, damage-free leaves from trees like maples and oaks during peak autumn. Prepare your workspace with newspapers, heavy books, and protective sheets. Press the leaves between parchment paper or newspaper, then store in a dry, ventilated space until fully dried. Once pressed, arrange and frame them in natural or modern frames, personalizing with notes or decorations. Keep your framed art vibrant by controlling light and humidity—discover more tips to preserve your cherished moments.
Key Takeaways
- Collect vibrant, damage-free leaves during peak fall for a colorful, lasting pressed display.
- Use heavy books or a plant press to carefully flatten and dry leaves, preserving their shape and color.
- Arrange pressed leaves creatively in frames, complementing their hues with suitable frame styles and decor.
- Protect preserved leaves from sunlight, humidity, and environmental damage to maintain their vibrancy over time.
- Personalize framed leaf art with notes, quotes, or themed decorations to cherish and showcase seasonal memories.
Gathering and Choosing the Perfect Leaves
As you begin gathering leaves for pressing, it’s important to select those that are vibrant, flat, and free from damage. Proper leaf identification helps you choose the best specimens, typically from trees like maples, oaks, or sweetgums, whose leaves display striking fall colors. Seasonal timing plays a vital role; aim to collect leaves when they are at their peak color, usually mid to late autumn. Avoid leaves that are wilted, torn, or brown, as they won’t press well or retain their beauty. Look for leaves that are still supple but fully developed in their coloration. Gathering the right leaves ensures your pressed art will be lively and enduring, capturing the essence of fall’s fleeting beauty. Additionally, selecting leaves from popular Water Parks in Owatonna, MN or other seasonal attractions can make the experience more enjoyable if combined with outdoor activities.
Preparing Your Workspace and Materials
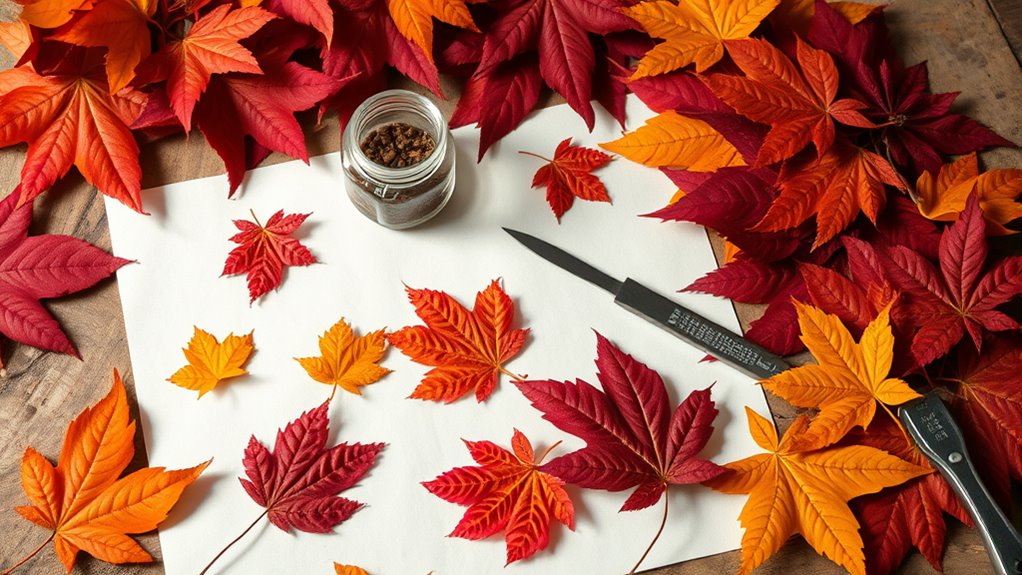
Before you start pressing leaves, set up a clean, flat workspace that’s free of dust and clutter. Proper workspace organization helps you stay efficient and prevents accidental damage to your delicate leaves. Gather all necessary materials—newspapers, heavy books, tweezers, and protective sheets—and keep them within easy reach. Make sure your workspace is well-ventilated and free of hazards, following safety precautions like handling glue or scissors carefully. Clear the area of any unnecessary items to prevent spills or accidents. Protect surfaces with old newspapers or a cloth to keep your space tidy. By preparing your workspace thoughtfully, you streamline the pressing process and reduce risks, making it easier to focus on creating beautiful, preserved leaves that you’ll cherish framing later. Additionally, understanding regional legal resources can be helpful if you need professional assistance or advice during crafting projects or related activities.
Techniques for Pressing and Drying Leaves
To get the best results, choose leaves that are bright and free of blemishes. Proper drying techniques, like pressing leaves between heavy books or using a plant press, help preserve their color and shape. Once dried correctly, your leaves will be vibrant and ready for your craft projects. Incorporating techniques for emotional regulation can also enhance your overall crafting experience by reducing stress and increasing mindfulness.
Selecting Vibrant Leaves
Ever wonder how to choose the most vibrant leaves for your pressing craft? Start by observing leaf color variations, which can range from bright yellows and fiery reds to deep purples and oranges. During seasonal leaf selection, look for leaves that show rich, bold hues and avoid those with brown spots or signs of decay. Select leaves that are flat, intact, and free from damage, as these will press best and retain their vibrancy longer. Timing is key: the best leaves are often found early in the fall when colors are at their peak. By carefully choosing leaves with vivid, lively colors, you’ll create a stunning pressed piece that truly captures the essence of the season. Additionally, understanding how attention enhances your focus can help you select the most striking leaves with greater care.
Proper Drying Techniques
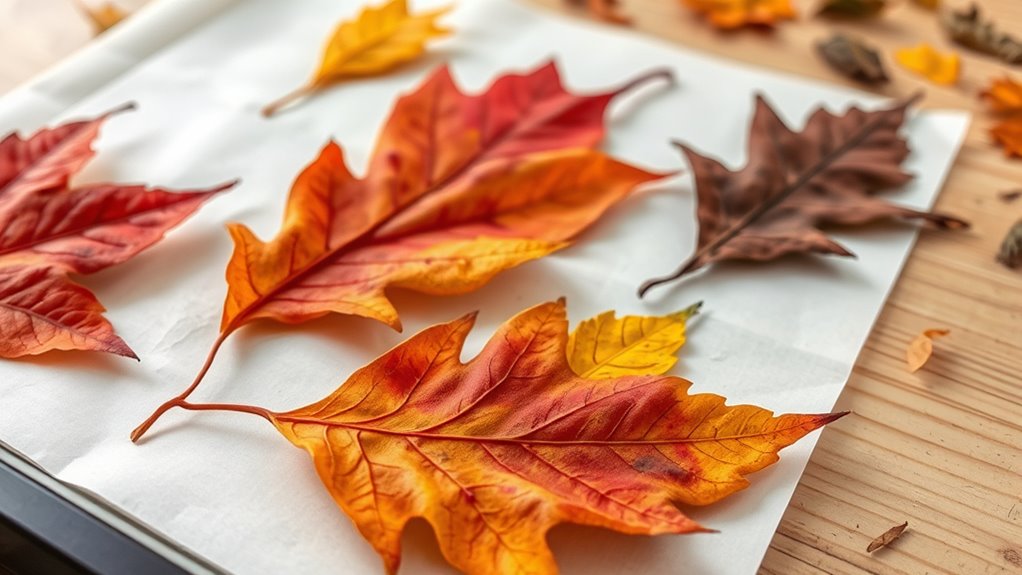
Once you’ve selected vibrant, damage-free leaves, the next step is to guarantee they dry properly to preserve their color and shape. Proper drying techniques are essential for effective leaf preservation. Place the leaves between sheets of parchment paper or newspaper, then press them in a heavy book or a leaf press. To ensure ideal preservation, control humidity by keeping the environment dry and well-ventilated. Avoid excessive moisture, which can cause mold or warping, and high humidity, which slows down the drying process. Check the leaves regularly, replacing any moisture-absorbing materials as needed. With careful humidity control and proper pressing, your leaves will dry flat, retaining their vivid colors and delicate details for framing and keepsakes. Maintaining a consistent environment can also help prevent leaf deterioration and ensure long-lasting preservation.
Arranging and Framing Your Preserved Leaves
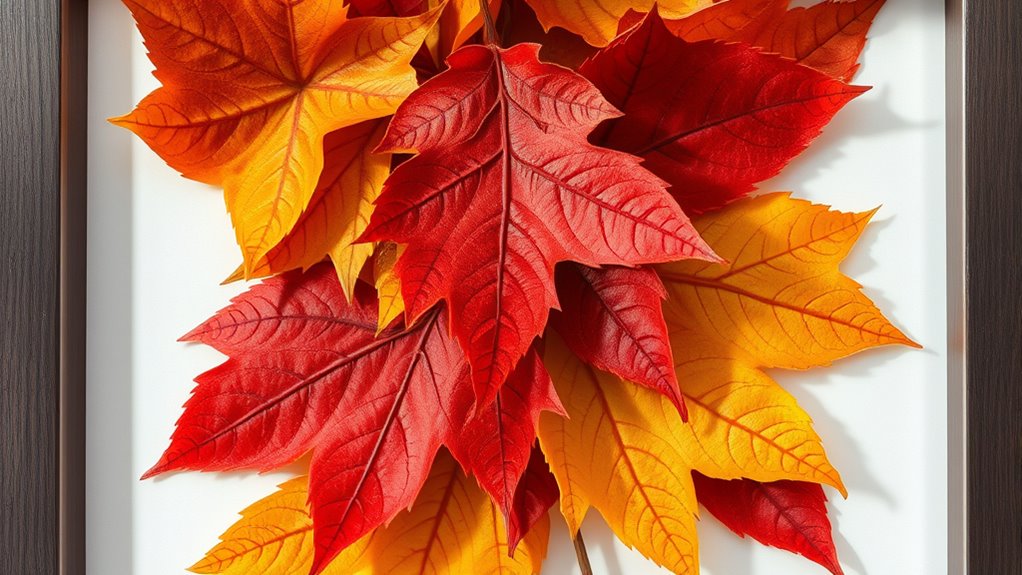
Choosing the right frame can make your leaf art stand out beautifully. Once you have your preserved leaves, experiment with different arrangements to find the most eye-catching display. With a few simple steps, you’ll create a stunning piece to showcase your fall treasures. Additionally, selecting a high-quality frame with a suitable material can help protect your artwork and enhance its presentation.
Choosing the Perfect Frame
Selecting the right frame is essential to showcase your pressed leaves beautifully. Your choice influences how leaf color variations and textures stand out. Opt for a frame material that complements the fall vibe—wood adds warmth, while metal offers a sleek look. Consider the color of the frame to enhance your leaves; earthy tones emphasize natural hues, while bold colors create contrast. Here’s a quick guide:
| Frame Material | Best Use | Style Tip |
|---|---|---|
| Wood | Warm, rustic | Complements autumn tones |
| Metal | Modern, sleek | Highlights vibrant colors |
| Plastic | Budget-friendly | Versatile options |
| Glass | Transparent, elegant | Protects and showcases |
Choose wisely to make your pressed leaves a stunning display of fall’s beauty. Incorporating vintage decor can also add a charming touch to your framing display, enhancing the overall aesthetic.
Arranging Leaves Artfully
Arranging your pressed leaves thoughtfully can turn a simple collection into a stunning piece of art. Focus on blending fall color and leaf textures to create visual interest. Start by laying out leaves with vibrant reds, oranges, and yellows, balancing bold hues with subdued tones. Consider grouping leaves by shape or texture for contrast. Use these ideas to guide your arrangement:
- Place larger, textured leaves as a backdrop, highlighting their intricate veins.
- Layer smaller, colorful leaves on top for depth and visual pop.
- Experiment with symmetry or asymmetry to evoke harmony or spontaneity, depending on your style.
Creative Ideas for Personalizing Your Leaf Art
To make your leaf art truly unique, consider personalizing each piece with creative touches that reflect your style. You can incorporate leaf color symbolism—reds and oranges symbolize warmth and energy, while yellows evoke happiness and sunshine. Use these colors to enhance your designs or choose leaves that match your mood or theme. Adding handwritten notes, dates, or quotes directly on the leaves brings a personal touch, making each piece meaningful. You might also frame your pressed leaves with complementary seasonal home decor elements, like pinecones or small branches, to create a cohesive display. Incorporating these personal details transforms simple pressed leaves into cherished keepsakes, perfectly suited for seasonal decor that celebrates the beauty of autumn and your unique style. Proper storage in a dry, dark place can help preserve the integrity of your leaf art over time to prevent spoilage.
Tips for Preserving and Displaying Your Framed Leaves

Proper preservation is key to ensuring your pressed leaves remain vibrant and intact over time. To keep leaf color variations lively, handle your leaves gently and avoid direct sunlight, which can fade their hues. When displaying, consider seasonal collection tips like grouping leaves by color or size for a cohesive look. To enhance preservation and presentation, follow these tips:
- Use acid-free framing materials to prevent discoloration.
- Keep your framed leaves in a cool, dry spot away from sunlight.
- Regularly dust and inspect your display to catch any signs of deterioration early.
- Be mindful of leaf color variations and how environmental factors can influence their vibrancy over time.
Frequently Asked Questions
How Long Does It Typically Take to Press and Dry Leaves Effectively?
You’re wondering about the leaf pressing duration and ideal drying time. Usually, it takes about 1 to 2 weeks for leaves to press and dry thoroughly. To speed up the process, use heavy books or a leaf press and change the blotting paper if it gets damp. Keep the leaves in a cool, dry place away from sunlight. Patience guarantees your pressed leaves stay vibrant and preserved.
Can Non-Native or Exotic Leaves Be Pressed Successfully?
Think of exotic leaf preservation as a delicate dance with nature’s more mysterious partners. Non-native leaf challenges include their often thinner or more fragile structure, making pressing trickier. However, with patience and gentle handling, you can successfully press and preserve these unique leaves. They add a vibrant touch to your collection, proving that even the most unfamiliar foliage can be transformed into beautiful keepsakes through careful pressing.
What Are the Best Adhesives for Attaching Leaves to Frames?
When attaching leaves to frames, you want a reliable leaf adhesive or mounting glue that won’t damage them over time. Consider using a clear, acid-free adhesive designed for delicate materials, like a specialized craft glue or a spray adhesive. Apply sparingly to prevent wrinkling or curling, and press gently to ensure a secure hold. Using the right adhesive assists in preserving your leaves beautifully, keeping your framed moments intact for years.
How Can I Prevent Mold or Deterioration Over Time?
To prevent mold and deterioration over time, you should focus on mold prevention and proper preservation techniques. Keep your pressed leaves in a cool, dry, and well-ventilated space, avoiding humidity and direct sunlight. Use acid-free materials and sealed frames to protect against moisture and pollutants. Regularly check your display for any signs of mold or damage, and clean gently to maintain your preserved leaves’ beauty over the years.
Are There Eco-Friendly Alternatives to Traditional Framing Materials?
Imagine designing a frame from recycled wine bottles, blending creativity with sustainability. You can choose sustainable framing options, like bamboo or reclaimed wood, to protect your pressed leaves while reducing environmental impact. These eco-friendly alternatives utilize recycled materials, ensuring your cherished moments are preserved with care for the planet. By opting for sustainable framing, you not only enhance your artwork’s beauty but also contribute to a greener future.
Conclusion
Now that you’ve mastered the art of leaf pressing, your framed treasures become windows to fall’s fleeting beauty. With each pressed leaf, you’re capturing a moment that’s as delicate as a whisper of wind. So, gather your favorite leaves, get creative with your framing, and turn everyday nature into timeless keepsakes. These personalized pieces will remind you that even in change, there’s beauty waiting to be preserved—like a whisper of autumn’s magic, forever etched in time.