
Install and configure smart home security cameras to monitor the areas you choose, review recordings, and receive useful alerts. This guide is for homeowners and renters who can use a smartphone app and connect a device to home Wi-Fi. Allow about 1-2 hours for planning, installation, configuration, and a full check of each camera.

Give the gift of listening to the book lover on your list
- Choose a 1-, 3-, 6- or 12-month membership
- They pick the audiobooks they love
- Easy to send by email

Blink Outdoor 4 Security Camera and Battery Doorbell 2K+ Kit, 3 Cameras, Sync Module Core, Black
- ✔ Included devices: 3 Outdoor 4 cameras, Battery Doorbell 2K+, Sync Module Core
- ✔ Outdoor camera video: 1080p HD
- ✔ Doorbell video: 2K (1920 x 1920)

ADT Blu Indoor Camera Home Security System with 2K Video
- ✔ Included components: Base hub, indoor camera, door/window sensor, motion sensor, yard sign, window stickers
- ✔ Video resolution: 2K
- ✔ Night vision range: 20 feet
Blink Outdoor 4 Camera and Battery Doorbell 2K+ Bundle, 5 Cameras, Sync Module Core, Black
- ✔ Included devices: 5 Outdoor 4 cameras, Battery Doorbell 2K+, Sync Module Core
- ✔ Outdoor camera video: 1080p HD
- ✔ Doorbell video: 2K (1920 x 1920)
Difficulty: Beginner | Time: 1-2 hours
What You’ll Need
Tools & Materials:
- Smart security camera and its power cable or charged battery
- Smartphone or tablet with the camera maker’s app
- Home Wi-Fi name and password
- Screwdriver and mounting hardware, if installing a fixed camera
- Ladder, if needed to reach a mounting point
Knowledge:
- Basic smartphone app use
- How to identify your home Wi-Fi network
- How to use a screwdriver safely, if mounting the camera
Check the camera’s instructions for supported Wi-Fi bands, power needs, weather rating, and storage options. Ask the property owner or building manager before drilling. Pick a camera location that records your own property and avoids private areas belonging to neighbors.
Blink Outdoor 4 Security Camera and Battery Doorbell 2K+ Kit, 3 Cameras, Sync Module Core, Black
This is the most balanced option in the lineup for households that want to monitor several outdoor approaches and the front door. The kit combines three weather-resistant Outdoor 4 cameras with a 2K Battery Doorbell, so buyers get more than a single-camera starter setup without committing to the five-camera bundle. The doorbell’s square 2K video is a useful distinction from the outdoor cameras, which record in 1080p HD.Both device types support live view, night vision, and two-way audio. The Outdoor 4 cameras have a 143-degree diagonal field of view and a stated operating range from -4°F to 113°F, giving the kit flexibility for common exterior placements. Battery power avoids running cables to each camera, but the included AA lithium batteries are non-rechargeable; how often they need replacement depends on use and conditions.Compared with ADT Blu, this Blink kit is the clear fit for outdoor coverage, while ADT’s indoor camera and sensors are better suited to rooms and entry points inside. Compared with the five-camera Blink bundle, this version is easier to justify for a smaller property and includes the same type of 2K doorbell. Its main limitation is that person and vehicle alerts and clip features require a separately sold plan. We would choose it for straightforward outdoor coverage, but skip it if rechargeable power or plan-free smart detection is a priority.
Pros:
- Includes three outdoor cameras, a 2K doorbell, Sync Module Core, batteries, and mounting accessories.
- Outdoor cameras offer 1080p HD, night vision, two-way audio, and a 143-degree diagonal field of view.
- Weather-resistant cameras have a stated operating range of -4°F to 113°F.
- The doorbell records square 2K video and supports two-way audio.
Cons:
- Included AA lithium batteries are non-rechargeable.
- Person and vehicle detection alerts and clip features require a separately sold Blink plan.
- Cameras connect over 2.4 GHz Wi-Fi, and battery life varies with use and conditions.
Best for: Households that want several battery-powered outdoor cameras and a 2K doorbell for a typical home perimeter.
Not ideal for: Buyers who need rechargeable batteries, advanced detection without a separate plan, or an indoor sensor-focused system.
Bottom line: For a balanced outdoor setup with a 2K doorbell, this three-camera Blink kit offers the best coverage-to-complexity fit in the lineup.
“For a balanced outdoor setup with a 2K doorbell, this three-camera Blink kit offers the best coverage-to-complexity fit in the lineup.”
ADT Blu Indoor Camera Home Security System with 2K Video
ADT Blu takes a different approach from the Blink bundles: instead of spreading cameras around the exterior, it pairs a 2K indoor camera with a base hub, door/window sensor, and pet-friendly motion sensor. That makes it the most relevant choice here for someone building an indoor system around rooms and entry points. The included yard sign and window stickers add visible deterrents, while app-guided DIY installation is intended to make setup approachable.The camera includes night vision with a stated 20-foot range, motion detection, and two-way audio through the ADT+ app. Its physical privacy cover is a meaningful differentiator for rooms where we want to block the lens when monitoring is not appropriate. The base hub has cellular backup, while accessories use Bluetooth; the camera itself connects over Wi-Fi. Unlike the outdoor Blink cameras, this model is intended for indoor use and is tabletop mounted.Compared with either Blink kit, ADT Blu offers more entry and motion sensing in the box, but no outdoor camera network or doorbell. Monitoring plans are available by subscription, and monitoring requires a paid plan, so buyers should account for that continuing requirement. Its 90-day limited warranty on eligible equipment parts is also shorter than Blink’s one-year limited warranty. Choose ADT Blu when indoor sensors, privacy control, and a guided setup matter more than exterior coverage; skip it if you need weather-ready cameras or want monitoring without a paid subscription.
Pros:
- Combines a 2K indoor camera with a hub, door/window sensor, and pet-friendly motion sensor.
- Physical privacy cover blocks the camera lens when desired.
- Offers night vision, motion detection, and two-way audio through the ADT+ app.
- App-guided DIY setup supports adhesive or screw-mounted sensors.
Cons:
- Monitoring requires a paid subscription.
- The camera is intended for indoor use and does not replace an outdoor camera or doorbell.
- Eligible equipment parts have a 90-day limited warranty.
Best for: People seeking an indoor camera paired with door/window and motion sensors, plus a physical way to cover the lens.
Not ideal for: Buyers whose priority is outdoor surveillance, a video doorbell, or monitoring without a paid subscription.
Bottom line: ADT Blu is the lineup’s indoor specialist, pairing 2K viewing with sensors and lens privacy at the cost of subscription-based monitoring.
“ADT Blu is the lineup’s indoor specialist, pairing 2K viewing with sensors and lens privacy at the cost of subscription-based monitoring.”
Blink Outdoor 4 Camera and Battery Doorbell 2K+ Bundle, 5 Cameras, Sync Module Core, Black
For a larger property or a buyer who wants cameras on more sides of the home, this bundle offers the lineup’s broadest exterior coverage: five Outdoor 4 cameras plus the same kind of 2K Battery Doorbell found in the smaller Blink kit. That extra camera count can help cover additional approaches, detached areas, or blind spots, though buyers should map placement before choosing a larger system. More cameras are useful only when each has a clear view and reliable Wi-Fi.The Outdoor 4 units record 1080p HD, with a 143-degree diagonal field of view, night vision, and two-way audio. The doorbell records square 2K video. All are battery powered and designed for weather exposure; the stated outdoor camera operating range is -4°F to 113°F. The bundle lists 13 AA Energizer lithium batteries, but these are non-rechargeable. The up-to-two-year battery-life figure depends on settings, use, and environment, so it should not be treated as a guaranteed interval.Compared with the three-camera kit, this bundle is for buyers who need the additional camera positions, not those seeking a higher outdoor video resolution. Both Blink kits share the 2.4 GHz Wi-Fi requirement and the need for a separately sold Blink plan for smart detection and cloud clip storage features. Compared with ADT Blu, it is much more focused on the home’s exterior and lacks that system’s indoor entry and motion sensors. We would skip it for a compact home or anyone who wants rechargeable batteries and plan-independent clip features.
Pros:
- Includes five outdoor cameras, a 2K doorbell, Sync Module Core, batteries, and mounting accessories.
- Outdoor cameras support 1080p HD, night vision, and two-way audio.
- Weather-ready outdoor cameras have a stated operating range of -4°F to 113°F.
- The included doorbell records square 2K video.
Cons:
- The listed AA lithium batteries are non-rechargeable.
- Smart detection and cloud clip storage features require a separately sold Blink plan.
- Requires 2.4 GHz Wi-Fi and high-speed internet; actual battery life varies.
Best for: Owners of larger homes or properties who need five outdoor camera positions and a video doorbell.
Not ideal for: Buyers with limited camera placements, a preference for rechargeable power, or a need for indoor sensors and subscription-free smart detection.
Bottom line: This is the right Blink bundle when five outdoor viewpoints solve a real coverage need, though it does not improve outdoor resolution over the smaller kit.
“This is the right Blink bundle when five outdoor viewpoints solve a real coverage need, though it does not improve outdoor resolution over the smaller kit.”
As an Amazon Associate we earn from qualifying purchases.
Before You Start
Plan the view before you mount anything. Choose a location with a clear view of the area you want to monitor and a reliable Wi-Fi signal. Check that a power outlet or charging access is available. Avoid pointing a camera through a window unless its instructions support that use; reflections and night vision can make footage hard to see.
Review privacy and recording choices. Check local rules about recording audio and people outside your property. Decide who needs account access, how long recordings should be kept, and whether cloud storage requires a paid plan. Use a unique password for the camera account.
Step-by-Step Instructions
Step 1: Choose camera locations
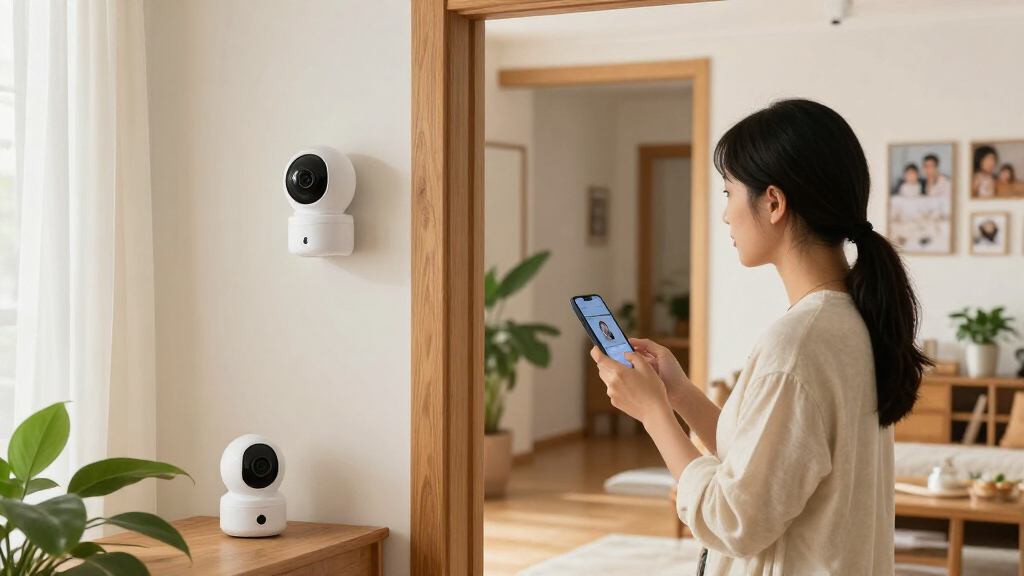
Walk through the areas you want to monitor and mark a proposed spot for each camera. Prioritize entryways, driveways, or other locations where a clear view will be useful. Check the view from camera height, including the edges of the image, and keep the lens away from direct sunlight, strong lamps, and objects that may block it.
For an indoor camera, place it where it can see the intended area without looking into bedrooms, bathrooms, or a neighbor’s windows. For an outdoor camera, use a sheltered point within the device’s stated weather limits.
Tip: Use the app’s live view while holding the camera in the proposed spot. This can reveal blind spots before you drill or attach a mount.
Check: The proposed view shows the intended area clearly, and the camera can reach power and Wi-Fi.
Step 2: Prepare the camera account
Install the official app from your phone’s app store. Create an account with a unique password, then turn on multi-factor sign-in if the app offers it. Check that your phone is connected to your home network and that Bluetooth and location access are available if the app requests them during pairing.
Read the app’s account-sharing and storage options before adding other household members. Give each person their own access when possible, so you can remove access later without changing the main account password.
Tip: Avoid using a password you already use for email or other services.
Check: You can sign in to the app, and the account’s security settings are available.
Step 3: Power on and pair each camera
Connect the camera to power or charge its battery according to the manufacturer’s instructions. Open the app, choose its option to add a device, and follow the pairing prompts. Scan the camera’s code or enter its setup details only as directed by the app.
Select the correct home Wi-Fi network and enter its password carefully. Some cameras require a 2.4 GHz network during setup. If the app cannot find the camera, check the product instructions for its supported bands before changing router settings. Add one camera at a time and give each a recognizable name, such as “Front Door.”
Tip: Keep the camera near the router during pairing. Move it to the planned location after the app reports a successful connection.
Check: The camera appears in the app with its chosen name and shows a live image.
Step 4: Update the camera and app
Open the camera’s device settings in the app and check for a firmware update. Install any available update while the camera has stable power and Wi-Fi. Keep the app open if it displays an update progress message, and wait for the device to reconnect before continuing. Update the phone app through its app store as well.
Tip: Do not unplug the camera during a firmware update. An interrupted update may leave the device offline until it restarts or receives support.
Check: The app shows the camera online after the update, and its settings open normally.
Step 5: Mount the camera securely
Hold the camera at the selected point and check the live image again. Mark the mounting holes, then attach the mount using the supplied hardware and suitable fixings for the wall or surface. Keep the camera’s cable clear of doors, walkways, and places where it could be pulled or damaged. Attach the camera to the mount and tighten it enough to hold its position.
For a battery camera, confirm that you can remove it for charging without dismantling the mount. For outdoor equipment, follow the instructions for sealing cable openings and protecting connections from moisture.
Tip: Use a stable ladder on level ground and keep tools secured while working above floor level.
Check: The camera stays in place, its view covers the intended area, and its cable or battery access is practical.
Step 6: Set recording and alert options
Open the camera’s recording settings and choose the storage method available to you, such as a memory card or a cloud plan. Set recording schedules to match when monitoring is needed. Then adjust motion detection so routine movement, such as passing traffic or tree branches, does not create a constant stream of alerts.
Use activity zones or privacy masks if available. Draw zones over the parts of the image you want monitored and mask areas that should not be recorded. Choose alert sensitivity, person or vehicle detection, and notification hours based on the camera’s features and your needs. Check whether audio recording is enabled and turn it off if you do not need it or local rules restrict it.
Tip: Start with moderate motion sensitivity. Review alerts for a few days, then adjust one setting at a time.
Check: The app displays the selected storage, schedule, activity zones, and alert settings.
Step 7: Limit account and network access
Review the app’s list of users and remove access for anyone who no longer needs it. Use individual invitations where available instead of sharing the main account login. Check that camera sharing is limited to the intended household members.
Use a strong, unique password for your home Wi-Fi and router administration. If your router offers a separate network for smart devices, follow its instructions to connect the cameras there. Keep router software up to date, and avoid exposing camera access directly to the public internet unless the manufacturer gives a specific, secure method you understand.
Tip: Check account access again when someone moves out or no longer needs to view the cameras.
Check: Only intended users can view the cameras, and the main account has a unique password.
Step 8: Test live view, alerts, and recordings
Stand in the monitored area and check the live view from your phone. Walk through the activity zone to see whether the camera detects movement and sends an alert. Wait for a recording to appear, then open it and check that the image and sound settings match your choices. Test night view after dark if the camera will be used overnight.
Repeat these checks for every camera. Confirm that each device has the right name, view, schedule, and storage setting. If the app provides a status page, check for warnings about Wi-Fi, battery, or storage.
Tip: Allow a short interval for alerts and clips to arrive; app delivery can take longer on a weak connection.
Check: Each camera shows a usable live image, detects a test event, and lets you play back a recording.
Common Mistakes to Avoid
- Mounting the camera before checking its live view. — Hold it at the planned height and inspect the app image before drilling or fixing the mount.
- Choosing motion sensitivity that sends alerts for constant background movement. — Set activity zones and begin with moderate sensitivity, then tune it after reviewing real alerts.
- Using a shared or reused account password. — Create a unique password, turn on multi-factor sign-in, and invite household members separately.
- Assuming a camera is recording because it appears online. — Trigger a test event and play back the saved clip from the app.
Troubleshooting
Problem: The app cannot find the camera during pairing.
Solution: Move the camera closer to the router, confirm that it is powered on and in pairing mode, and check the supported Wi-Fi band in its instructions. Restart pairing from the app if needed.
Problem: The live image freezes or the camera often goes offline.
Solution: Check Wi-Fi signal at the camera location and move the router or camera, or add a compatible access point. Confirm that the power cable or battery is secure.
Problem: The camera sends too many motion alerts.
Solution: Narrow the activity zone, lower sensitivity, or adjust detection types and alert hours. Change one setting at a time and review the result.
Problem: No recording appears after a test event.
Solution: Check that recording is enabled, a schedule covers the test time, and the selected storage plan or memory card is active and has space. Trigger another test and check playback.
What Success Looks Like
The setup is complete when every camera appears online under a clear name, shows the intended view, and remains powered and connected in its installed location. A test movement should produce the expected notification and a playable recording. The selected schedules, privacy zones, storage, and account access should match your choices.
Next Steps
Review alerts and recordings during the first week and adjust detection zones or sensitivity to reduce missed events and unwanted notifications. Check camera status, storage space, battery level, and app updates regularly. Clean the lens with a soft cloth when the image becomes hazy. Recheck account access when household membership changes, and review camera views after moving furniture or changing the outdoor area.
Frequently Asked Questions
Do smart security cameras need Wi-Fi?
Most app-connected cameras need Wi-Fi for setup, remote live viewing, alerts, and cloud storage. Some devices can save footage locally during an internet outage, but features vary. Check the camera’s instructions for its offline recording behavior.
Can I install a camera without drilling?
Many indoor cameras can sit on a shelf, and some models support adhesive mounts. Use only mounting methods approved by the manufacturer, and place the camera where it cannot fall or be easily moved. Outdoor placement may need a fixed mount.
Why does my camera need a 2.4 GHz Wi-Fi network?
Some cameras support 2.4 GHz Wi-Fi only, while others support multiple bands. Check the product requirements and router settings. If your router combines bands under one network name, follow the camera maker’s pairing instructions.
How can I reduce alerts from cars or trees?
Use activity zones to exclude roads or moving branches, lower motion sensitivity, and choose person detection if the camera offers it. Test each adjustment by walking through the area and checking the alert and clip.
How do I know whether a camera saves footage?
Trigger a test event, wait for it to process, and open the recording in the app. Check the clip’s time and image quality. Also confirm that the chosen cloud plan or local storage is active and has room for new footage.