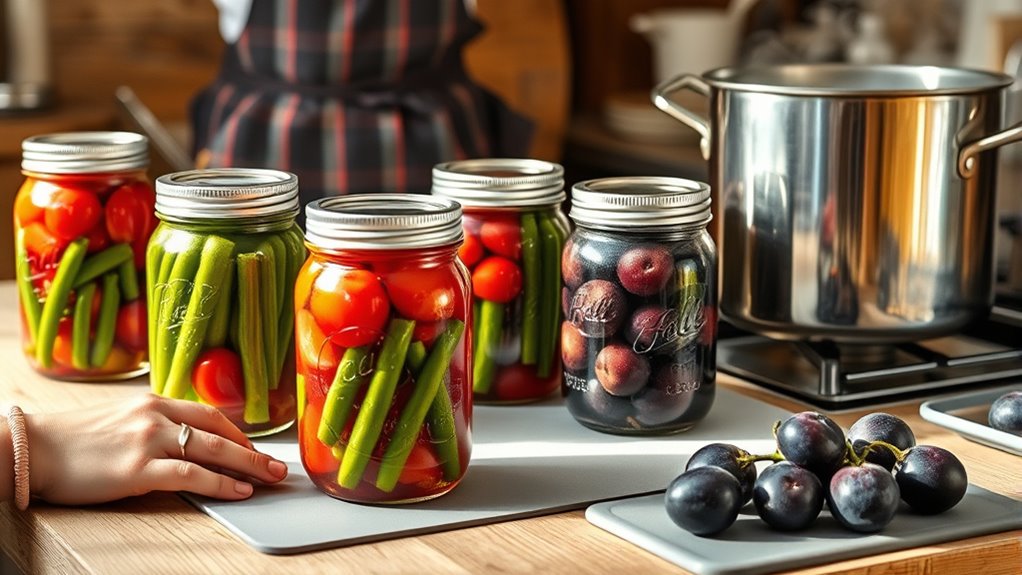

To safely can your garden harvests, start with proper equipment like clean jars, lids, and canning tools, ensuring everything is sterilized. Prepare your produce by washing, cutting, and blanching if needed, then fill jars with fruit or vegetables, leaving the correct headspace. Use water bath or pressure canning based on acidity, and process jars for the recommended time. Label and store jars in a cool, dark place. Keep learning the key steps to preserve your harvest safely.
Key Takeaways
- Use proper jar types, lids, and sterilization methods to ensure a safe seal and prevent contamination.
- Prepare produce thoroughly by washing, peeling, and blanching to maintain safety and quality.
- Follow specific processing times and techniques, such as water bath or pressure canning, based on food acidity.
- Leave appropriate headspace and check seals after processing to confirm jars are properly sealed.
- Store canned goods in a cool, dark place, label with dates, and monitor for signs of spoilage for safety.
Choosing the Right Canning Equipment

Choosing the right canning equipment is essential to guarantee your jars seal properly and your food stays safe. Start by selecting the appropriate canning jar types for your project, whether you prefer regular-mouth or wide-mouth jars. Not all jars are compatible with every lid, so check lid compatibility to ensure a proper seal. Using the wrong lid or jar type can lead to leaks or failed seals, risking spoilage. Invest in quality canning tools like a jar lifter, funnel, and a sturdy canner to make the process safer and more efficient. Always verify that your jars and lids match, and follow manufacturer instructions for sealing to prevent any mishaps. Proper equipment choice is key to successful, safe canning results. Additionally, checking jar compatibility with the intended lid type can help prevent issues during sealing.
Preparing Fruits and Vegetables for Canning

Have you prepared your fruits and vegetables properly before canning? Proper fruit selection is essential; choose ripe, blemish-free produce for the best flavor and safety. When it comes to vegetables preparation, wash them thoroughly to remove dirt and debris. Peel, trim, or cut your produce into uniform pieces to ensure even processing. Blanch vegetables by boiling briefly to preserve texture, color, and nutrients. For fruits, consider peeling or coring as needed and remove any damaged parts. Properly preparing your fruits and vegetables minimizes spoilage and improves the quality of your canned goods. Additionally, paying attention to color accuracy can help you select produce with vibrant, appealing hues, ensuring your canned items look as good as they taste. Take the time to inspect, clean, and handle each item carefully to ensure your harvest is safe and delicious when preserved.
Proper Sterilization and Jarring Techniques

To guarantee your canned goods are safe and flavorful, you need to sterilize your jars thoroughly before use. Proper sealing methods are essential to preserve freshness and prevent contamination. Always follow the recommended processing times to guarantee your jars are safely sealed and preserved.
Sterilize Jars Thoroughly
Before you fill your jars with hot preserves, it’s essential to sterilize them thoroughly to prevent spoilage and guarantee safety. Proper jars sterilization involves washing each jar with hot, soapy water and rinsing well. Then, you can sterilize using boiling water or a dishwasher set to sanitize. Make sure to soak or boil jars for at least 10 minutes to eliminate bacteria and mold spores. Follow good sanitation practices by handling jars with clean tongs or gloves to prevent recontamination. Inspect each jar for cracks or chips, as damaged jars can compromise the seal. Sterilizing jars correctly ensures your preserves stay fresh longer and reduces the risk of spoilage, making your canning process both safe and successful. Using the right filtration methods can also help keep dust or debris out of your preserves during the filling process.
Use Proper Sealing Methods
After thoroughly sterilizing your jars, the next step is to guarantee they are sealed correctly to keep your preserves safe and fresh. Proper sealing ensures your hard work isn’t lost to spoilage. Here are key jar sealing techniques to follow:
- Vacuum sealing: Use a vacuum sealer to remove air before sealing, preventing mold and bacteria.
- Check the lid: Press the center; it should pop back, indicating a proper seal.
- Apply consistent pressure: Ensure jars are tightly closed without over-tightening.
- Use proper tools: Employ a jar lifter and magnetic lid lifter for safe handling.
- Verify the seal: After processing, always double-check that your jars have formed an airtight seal, which is crucial for preventing spoilage and maintaining freshness.
These steps help create an airtight seal that preserves flavor and safety, giving you peace of mind with every jar.
Follow Safe Processing Times
Have you verified that your jars have been properly sterilized before filling? Proper sterilization is essential for botanical safety and prevents spoilage. Follow recommended processing times based on your jar size and contents to ensure safety and quality. Overprocessing can destroy nutrients, while underprocessing risks contamination. For fermented foods, adhere to specific fermentation techniques and timing to maintain safety and flavor. Use a reliable timer and temperature guidelines to avoid spoilage and ensure your preserves are safe for storage. Consistently following safe processing times minimizes the risk of botulism and other hazards, preserving your garden harvest effectively. Proper canning techniques are vital for maintaining the integrity of your preserves. When in doubt, consult trusted canning resources or guidelines to confirm your processing times match your specific jar and food type.
Understanding the Difference Between Water Bath and Pressure Canning

Understanding the difference between water bath and pressure canning is essential for safely preserving your foods. Water bath canning is ideal for high-acid foods like jams, pickles, and fruits, where pH testing confirms safety. Pressure canning, on the other hand, is necessary for low-acid foods such as vegetables and meats, requiring a higher temperature.
Consider these points:
- You’ll feel confident knowing which method prevents spoilage.
- Your family’s health depends on proper pH testing and acidity levels.
- Altitude considerations can affect processing times—adjust accordingly.
- Choosing the right method guarantees your harvest stays safe and delicious.
Ensuring Proper Headspace and Seal Integrity

Ensuring proper headspace and seal integrity is essential for safe and successful canning. Following headspace guidelines helps prevent spoilage and seal failure. You should leave the recommended space—usually ¼ inch for jams and ½ inch for vegetables—to allow gases to expand. Check your jars for proper sealing after processing, ensuring the lid is concave and tight. To prevent seal failure, wipe jar rims clean before placing lids and avoid over-tightening. Use the following table to guide your process:
| Food Type | Headspace | Seal Check |
|---|---|---|
| Fruits | ¼ inch | Lid concave, tight |
| Vegetables | ½ inch | No looseness, secure |
| Juices | ¼ inch | Proper vacuum seal |
| Jams | ¼ inch | No air bubbles |
| Pickles | ½ inch | Firm lid |
Adhering to these guidelines ensures safe, well-sealed jars. Properly maintaining these parameters helps ensure the longevity and safety of your canned goods, promoting overall mental wellbeing and confidence in your preservation skills.
Monitoring Processing Times and Temperatures

Monitoring processing times and temperatures is essential to guarantee your canned foods are safe and shelf-stable. Proper temperature control and processing accuracy prevent spoilage and ensure safety. To do this effectively, you should:
Ensuring proper temperature and timing safeguards your canned foods’ safety and shelf stability.
- Use a reliable thermometer to monitor water bath or pressure canner temperatures constantly.
- Follow tested recipes precisely for processing times based on jar size and food type.
- Adjust for altitude to maintain correct processing temperatures, avoiding under- or over-processing.
- Keep a processing log to track times and temperatures, ensuring consistency and safety.
- Recognize that AI security measures can help monitor and ensure the integrity of your processing data.
Storing and Labeling Your Canned Goods

To preserve your canned goods fresh and safe, you need to store them in a cool, dark, and dry place. Proper labeling helps you easily identify contents and expiration dates, preventing waste. Clear, consistent labels ensure your pantry stays organized and your canned foods stay in top condition. Using labeling techniques can further improve your organization and help track the age of your preserved foods.
Proper Storage Conditions
Proper storage conditions are essential to keep your canned goods safe and make certain they last as long as possible. Maintaining ideal temperature control and humidity management prevents spoilage and preserves quality. To ensure your jars stay fresh, focus on:
- Storing in a cool, dark place—preferably between 50-70°F—to inhibit bacteria growth.
- Keeping humidity low—around 60% or less—to prevent rust and mold.
- Avoiding temperature fluctuations—consistent conditions protect the integrity of your canned goods.
- Using sturdy shelves that support weight and allow air circulation, enhancing overall storage conditions.
- Selecting appropriate storage containers made from materials that do not react with food or promote condensation, which can compromise the canned goods’ safety material safety.
Effective Labeling Practices
Have you ever wondered how to quickly identify your canned goods and guarantee they stay organized? Effective labeling practices are key. Always include the labeling date so you know when the item was canned, helping you use older jars first. Use labels with good durability to withstand moisture and handling; paper labels may tear, but waterproof labels last longer. Consider the table below to understand the importance:
| Labeling Date | Label Durability |
|---|---|
| Ensures freshness tracking | Prevents peeling or fading |
| Helps rotate stock | Maintains clarity over time |
| Avoids confusion | Keeps labels legible |
| Simplifies inventory | Protects against moisture |
Proper labeling also aids in maintaining consistent food safety standards during storage. Clear, durable labels save time and reduce waste, keeping your canned goods safe and organized.
Frequently Asked Questions
How Long Can Canned Goods Be Safely Stored?
You can typically store canned goods for about 1 to 2 years, but this depends on proper storage duration and checking spoilage indicators. Keep jars in a cool, dark place and avoid temperature fluctuations. Regularly inspect for signs of spoilage, like bulging lids, leaks, or foul odors. If any of these indicators appear, it’s safest to discard the product. Proper storage guarantees your canned harvest remains safe and tasty.
Can I Reuse Canning Jars and Lids?
You can reuse canning jars, but be cautious about jar lid longevity and reuse safety. Always inspect lids for rust, dents, or warping—if damaged, they shouldn’t be reused. Reusing metal lids isn’t recommended because they lose their sealing ability after one use, but you can reuse jars multiple times if they’re in good condition. For best results, use new lids each time to ensure a proper seal and food safety.
What Signs Indicate Spoiled Canned Food?
Imagine opening your jar and noticing a cloudy liquid or bubbling inside—that’s visual spoilage. These signs raise a red flag for botulism risk, making the food unsafe. You might also see bulging lids or foul odors. Trust your senses; if anything seems off, discard the contents immediately. Properly canned food should look, smell, and taste fresh, preventing illness and ensuring your harvest is safe to enjoy.
Are There Different Safety Tips for Low-Acid Foods?
You should always follow specific safety tips for low-acid foods. Use pH testing to guarantee acidity levels are correct—low-acid foods need a pH above 4.6. Pressure canning is essential because it reaches higher temperatures to kill bacteria like botulism. Never skip these steps, and always follow tested recipes and guidelines for low-acid foods to keep your canned goods safe.
How Do I Avoid Common Canning Mistakes?
Ever wonder how to avoid common canning mistakes? You should always focus on proper sterilization to prevent bacteria growth and guarantee your jars are compatible with your canning process. Double-check jar lids and rims for flaws, and follow tested recipes precisely. Are you using the right equipment? Using the wrong jars or not maintaining proper sterilization can compromise safety. Carefully follow guidelines to keep your canned goods safe and delicious.
Conclusion
Now that you’ve mastered the art of safe canning, go ahead—turn your garden bounty into lifelong treasures. Just remember, underprocessing could turn your jam into a science experiment, and over-tightening might turn jars into exploding surprises. Follow these tips diligently, and you’ll enjoy peace of mind and delicious results. So, get those lids popping, your pantry stocked, and your neighbors wondering how you turned humble harvests into canned perfection—safely, of course.