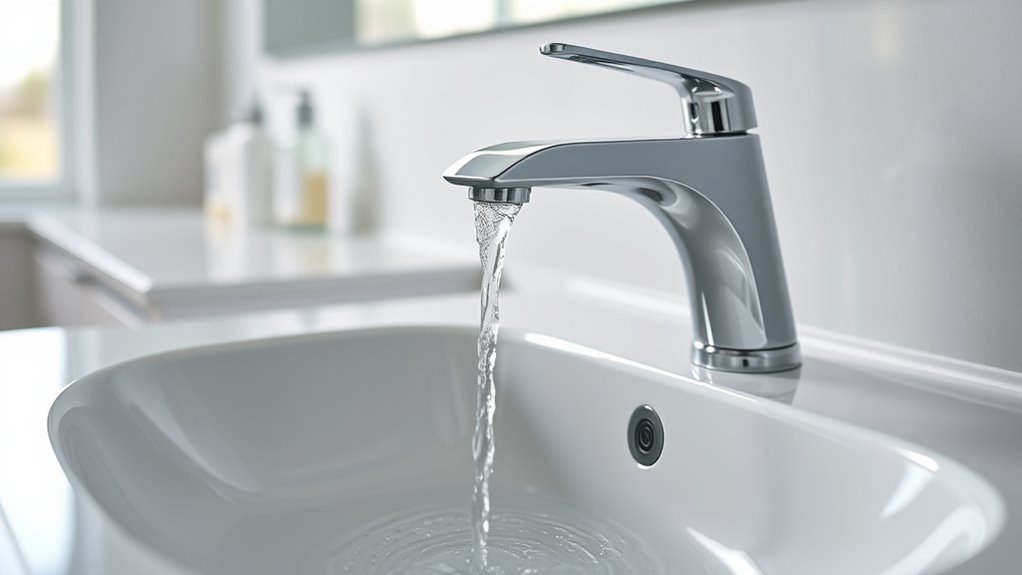

To install a motion-activated faucet over the weekend, start by gathering tools like screwdrivers, wrenches, and seal tape. Turn off the water supply and prepare your workspace. Carefully remove the old faucet, then mount and secure the new one according to the instructions. Connect electrical components safely and test the system for proper function. Finish with final checks and cleanup—if you continue, you’ll get all the detailed steps to do it right.
Key Takeaways
- Gather all necessary tools, materials, and the user manual before starting the installation process.
- Turn off the main water supply and carefully remove the old faucet, disconnecting supply lines safely.
- Install the new motion-activated faucet, ensuring proper mounting and sensor calibration as per manufacturer instructions.
- Connect electrical components securely, following safety standards and verifying connections before powering on.
- Test the faucet thoroughly for correct operation, check for leaks, and clean the workspace for a finished, safe setup.
Gathering Your Tools and Materials
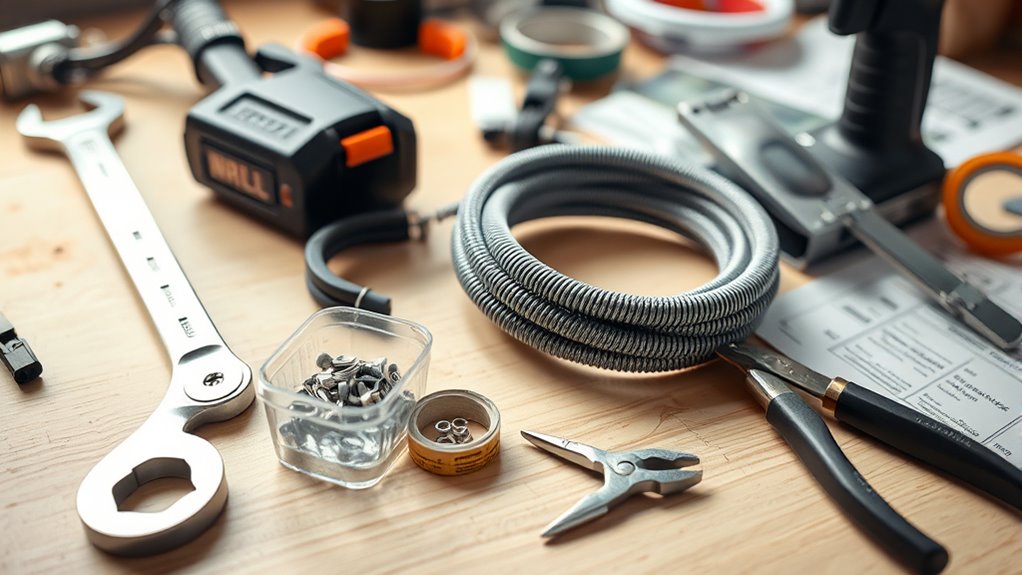
Before you begin installing your motion-activated faucet, it is essential to gather all the necessary tools and materials. You’ll need a screwdriver, adjustable wrench, pliers, and possibly a drill. Make sure you have the user manual handy for specific instructions. Check that your water supply has adequate water pressure, as this affects sensor calibration and overall performance. You might also need thread seal tape to prevent leaks. Having these tools ready guarantees a smooth installation process. Double-check that you have the faucet components, including the sensor, mounting hardware, and hoses. Preparing everything beforehand saves time and frustration when you start connecting the parts. Being well-organized at this stage makes it easier to follow each step and ensures your motion-activated faucet functions properly. Additionally, understanding water pressure helps optimize sensor performance and longevity.
Turning Off Water Supply and Preparing the Area

Start by turning off the main water supply to prevent any leaks or water flow while installing the faucet. Locate your plumbing shutoff valve—usually under the sink or near the meter—and close it fully. This step avoids water damage and simplifies water drainage. Before proceeding, open the existing faucet to release remaining water pressure and drain residual water. Prepare your workspace by placing towels or a bucket beneath the area to catch any drips. Here’s a quick overview:
| Step | Action | Tip |
|---|---|---|
| Locate plumbing shutoff | Find and turn off the main water valve | Check for accessibility |
| Drain water | Open existing faucet to release water | Keep towels handy |
| Clear area | Remove items from under sink | Ensure working space |
| Prepare tools | Gather necessary tools | Avoid delays |
| Safety precautions | Wear gloves and goggles | Protect yourself |
Additionally, consulting proper plumbing procedures can help ensure a smooth installation process.
Removing the Old Faucet Carefully

Careful removal of the old faucet is essential to avoid damaging your sink or plumbing. Start by loosening and removing the mounting nuts beneath the sink. Then, disconnect the supply lines carefully to prevent leaks. During faucet removal, pay attention to how the plumbing disassembly was done so you can replicate it later. Use a basin or towel to catch any water left in the lines. Check for any caulk or sealant holding the faucet in place and gently pry it free. Be cautious not to scratch or crack the sink surface. Keep all nuts, washers, and parts organized for easy reassembly. Proper faucet removal guarantees a smooth transition to your new motion-activated faucet without unnecessary damage. Additionally, inspecting the self-watering plant pots can help you plan future gardening projects easily.
Installing the New Motion-Activated Faucet

Installing your new motion-activated faucet involves carefully aligning it with the mounting surface and securing it in place. Once mounted, you’ll want to calibrate the sensor to ensure it detects motion accurately. Follow the manufacturer’s instructions to adjust the sensor settings, so it activates reliably without false triggers. After installation, check the battery compartment; replace or insert fresh batteries as needed, since low power can affect sensor performance. Proper battery maintenance ensures your faucet operates smoothly and prevents unexpected downtime. Make sure the batteries are seated correctly and test the sensor’s responsiveness. Take your time to finalize the positioning and calibration, as these steps directly impact the faucet’s functionality and your satisfaction with the upgrade.
Connecting the Electrical Components Safely
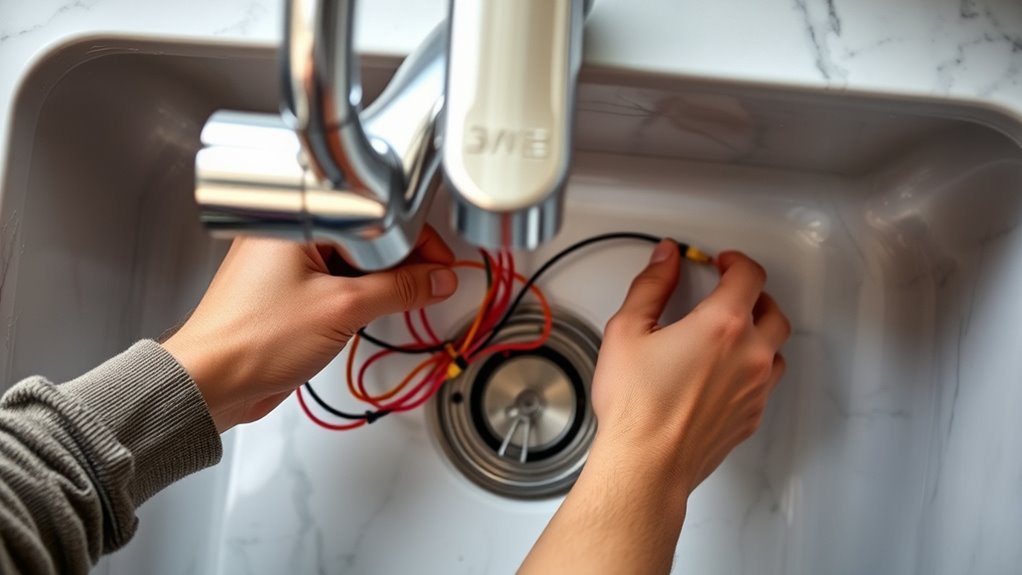
When connecting the electrical components, you need to choose a safe power source and guarantee your wiring is correct. Use proper techniques to prevent shorts or loose connections, and always follow safety precautions. Taking these steps helps protect you and ensures your faucet works reliably. Additionally, consulting Honda Tuning resources can provide insights into best practices for electrical modifications and enhancements.
Power Source Choices
Choosing the right power source for your motion-activated faucet is essential to guarantee safe and reliable operation. You have several options to consider. Battery options provide portability and easy installation, especially in areas without nearby outlets. A power cord placement is crucial; ensure it’s hidden and secured to prevent tripping or damage. You might opt for a plug-in adapter if outlets are accessible, but keep cords tidy and away from water. Some systems support rechargeable batteries, reducing waste and ongoing costs. Always verify compatibility with your faucet model and consider safety features like waterproof connectors. Properly selecting your power source ensures consistent performance and minimizes hazards. Electrical safety standards are critical to ensure your installation complies with safety regulations and reduces the risk of electrical faults.
Proper Wiring Techniques
To guarantee your motion-activated faucet operates safely and reliably, you must connect the electrical components correctly. Start by following proper grounding techniques to prevent electrical shocks or shorts. Confirm all grounding wires are securely attached to the grounding terminal or grounding wire in your power source. Use appropriate wire connector types, such as wire nuts or crimp connectors, to join wires firmly and prevent loose connections. When wiring the sensor and power supply, keep wires organized and insulated to avoid accidental contact. Verify that connections are tight and free of corrosion. Proper wiring not only ensures safety but also enhances the faucet’s functionality and longevity. Always double-check your work before powering the system to prevent potential hazards. Additionally, understanding electrical safety best practices can help prevent accidents during installation.
Safety Precautions
Ensuring safety during electrical connections is essential to prevent shocks, short circuits, and damage. Always turn off power before working on electrical components and verify with a tester. Remember, water pressure can affect electrical safety; confirm the water supply is shut off to avoid leaks or accidental activation. Additionally, adhering to local electrical codes is crucial for safe and compliant installations.
Testing the System and Making Adjustments

Before you start testing the system, double-check all connections and batteries to make certain everything is properly installed. Power on the faucet and observe the sensor calibration—adjust the sensor’s sensitivity if needed to prevent false triggers or missed activations. Move your hand in front of the sensor to verify it responds correctly within the set range. Keep an eye out for troubleshooting alerts, such as indicator lights or error signals, which can indicate issues with the sensor or wiring. If the faucet doesn’t activate properly, recheck the sensor placement and calibration settings. Make small adjustments and retest until the system responds smoothly. Proper calibration ensures reliable operation, so take your time to fine-tune the sensitivity and response. Additionally, understanding meditation techniques can help you stay focused and patient during the adjustment process.
Final Checks and Cleanup

Before wrapping up, make sure the faucet works perfectly by testing all motion sensors and water flow. Once you’re confident everything operates smoothly, carefully clean your workspace to remove any debris or tools. These final steps guarantee your installation is both functional and tidy. Additionally, performing a thorough inspection of the plumbing connections ensures there are no leaks or issues after installation.
Verify Functionality Thoroughly
Once you’ve completed the installation, it’s essential to thoroughly test the faucet’s functionality to confirm everything works correctly. Start by checking the sensor calibration—ensure the sensor responds consistently when your hands are in front of it. Conduct leakage testing around the connections to detect any drips or moisture. Verify that the faucet turns on and off smoothly without delay. Adjust the sensor sensitivity if needed for maximum performance. Also, confirm the water flow rate is appropriate and that no leaks develop over time. Finally, double-check electrical connections for safety and proper operation. Proper testing methods help ensure a reliable and safe setup.
- Test sensor response from different distances and angles
- Inspect all fittings and hoses for leaks
- Confirm the faucet stops water flow when hands are removed
- Ensure electrical connections are secure and dry
Clean Workspace Carefully
After finishing the installation and testing, take time to carefully clean your workspace to guarantee safety and organization. Wipe down surfaces to remove any debris or excess sealant, ensuring no tools or parts are left behind. Check the water pressure to confirm it’s consistent and appropriate, which helps maintain the faucet’s durability over time. A clean workspace prevents accidental damage and makes future maintenance easier. Inspect the faucet connections once more, ensuring everything is secure and leak-free. Proper cleanup also reduces the risk of water damage or corrosion. Dispose of packaging materials responsibly, and store your tools neatly. Taking these final steps ensures your new motion-activated faucet functions reliably and remains in excellent condition for years to come.
Frequently Asked Questions
Can I Install a Motion-Activated Faucet Outdoors?
You can install a motion-activated faucet outdoors, but make certain it’s designed for outdoor installation. Look for models with weatherproof features that protect against rain, dirt, and temperature changes. Proper installation is vital to guarantee the sensor works reliably in outdoor conditions. By choosing a faucet specifically built for outdoor use and ensuring it’s weatherproof, you’ll enjoy the convenience without worrying about weather damage or malfunctions.
What Is the Typical Lifespan of a Motion-Activated Faucet?
A motion-activated faucet usually lasts around 5 to 10 years, but this depends on the sensor lifespan and usage. You might need to replace the sensor or entire unit more frequently if it’s exposed to harsh conditions or frequent use. Regular maintenance can prolong its lifespan. Keep an eye on sensor performance, and plan for replacements every few years to ensure smooth operation.
Do I Need a Professional Electrician for Wiring?
Did you know improper electrical wiring causes over 50% of household electrical fires? For your motion-activated faucet, you might wonder if you need a professional electrician. While some simple installations are doable, wiring involves risks, especially if your home’s wiring isn’t up to code. To stay safe and guarantee proper setup, it’s best to hire a professional electrician. They’ll handle the wiring correctly and give you peace of mind.
Are There Any Special Maintenance Tips for These Faucets?
You should regularly clean the sensor to guarantee it functions properly—use a soft cloth and avoid harsh chemicals. Check the batteries periodically and replace them when the faucet becomes unresponsive or shows low power indicators. Keep the sensor area dry and free of debris to maintain accuracy. Following these simple maintenance tips helps your motion-activated faucet stay in top shape, providing convenience and hygiene.
Will Installing This Faucet Increase My Water Bill Significantly?
Back in the day, folks thought fancy gadgets drained wallets faster, and your water bill might seem like a relic now. Installing a motion-activated faucet can actually boost water conservation since it reduces wastage, but initial installation costs could be a factor. Overall, it shouldn’t markedly spike your water bill if you use it wisely, making it a smart choice for saving water and money in the long run.
Conclusion
Once you finish installing your motion-activated faucet, enjoy the convenience and water savings it offers. Did you know that motion sensors can reduce water use by up to 30%? Regularly check the sensor’s sensitivity and connections to keep it working smoothly. With your new faucet in place, you’ll save time and resources, making your space more efficient. Just a little effort now means long-term benefits for both your home and the environment.